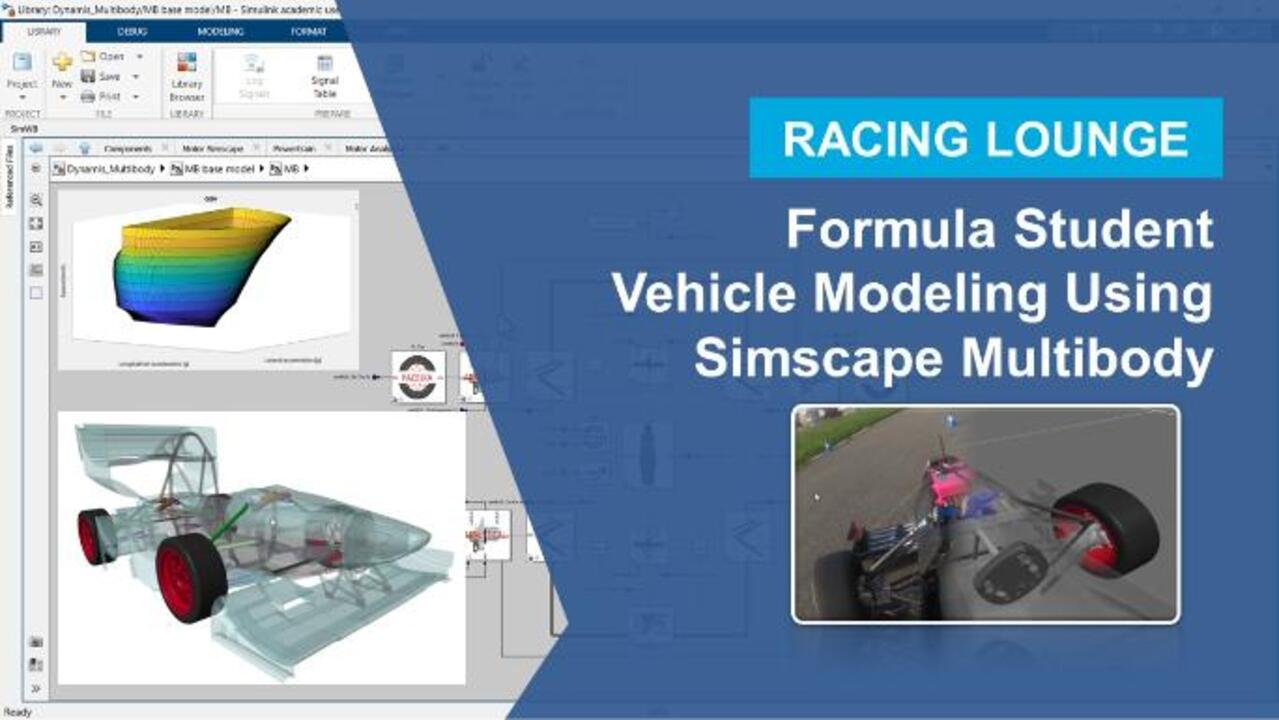
Formula Student Vehicle Modeling Using Simscape Multibody
From the series: Improving Your Racecar Development
Nicolò Poncia and Veer Alakshendra demonstrate how Simscape Multibody™ can be used to model and simulate a Formula Student vehicle. A high-fidelity vehicle model enables Formula Student teams to conduct open- and closed-loop maneuvers and lap-time simulations, test suspension systems in extreme road conditions, generate GGV plots, and optimize vehicle-level performance by adjusting design parameters in any system.
Published: 9 May 2023
Hi, everyone. Welcome to MATLAB and Simulink Racing Lounge. Veer, from the Student Programs Team, and really excited that we have a guest speaker, Nicoló, from Dynamis PRC Racing Team. And then Nicoló is going to talk about his Formula Student Vehicle Model that he developed using Simscape Multibody. So over to you, Nicoló. Why don't you introduce yourself, your team, and what you're going to talk about?
OK, thanks. Hi, everyone. I'm Nicoló Poncia from the Dynamis PRC. Currently, I'm the head of vehicle dynamics of Dynamis PRC. So we are a team of Formula Student. Currently, we are competing both in the electric and driverless category. We race since 2004, so it's quite a long time. And the team is composed by roughly 130 members, so we are quite a lot.
But in the last three years, the team was revolutionized because we switched both to the electric and the driverless category-- the electric in 2020 and the driverless category in 2022, with quite a lot of success. In fact, in last, year's season we scored a podium, both in Formula student Germany and the Formula Student East.
Perfect. So it seems like a huge team, Nicoló, and I can see the success you achieved. So let's move ahead, and can you give an overview of what you're going to show today?
Yeah, today, we are going to show the Multibody model. We developed a full-car Multibody model in which all the moving components of the car are actually modeled like we can see in this short demonstration. This was recorded-- the onboard-- during track testing in a racer. And we compared the video, giving the same inputs to the actual model, and the results are quite stunning.
Perfect. So yeah, we can see that you have extensively used Simscape Multibody. So those are new. Just to give an intro-- so Simscape Multibody is a part of Simscape. And with Simscape Multibody, you can enable Multibody simulation of 3D mechanical system, wherein you use different bodies and joints to assemble, and including import from CAD. And at the same time, as you can see on the slide, you don't need to derive the equations.
So with this short introduction regarding Simscape Multibody, let's move to the agenda and see that what we are going to cover today. So today, Nicoló will share the motivation behind this Multibody simulation, and then he'll also talk about model capabilities. And then the part which I'm really excited is a software demonstration. And then finally, we'll move to the results and model verification, followed by key takeaways, future plans, and resources that will be necessary or required if you're interested to build some models like these. Perfect. So let's go ahead, Nicoló, and tell us the audience-- what motivated you to build such amazing model?
Yeah, we developed, previously, from the Multibody model, already, a single-track and a double-track model. But to further enhance the model fidelity and the model complexity, we switched to a full-car Multibody model. The advantages of the Multibody model are actually a high level of fidelity. In fact, every component is physically modeled and actually represents what happens to the car. And also, a high versatility level is present. In fact, we can switch between different suspension configuration in a matter of seconds.
Another great advantage is the easiness of understanding. In fact, you don't have to derive equations, but you only need to actually comprehend what the car is actually doing. Also, a high level of user-friendly experience is present. In fact, by using all the MathWorks environment, all the processes are quite graphical and ready to use. In addition, also, the model is fast to run. Despite what somebody can think, the model is quite complex. But nevertheless, it's also very fast to run.
OK, perfect. So just to add, or if I summarize that, the motivation-- motivation, which you can talk about, or maybe you already covered in these topics, is that you can model the dynamic behavior of a vehicle. And then the best thing that you can do-- and even your team members-- those who are going to follow this model-- is you can have different vehicle configurations before you take any critical decision for your vehicle. Perfect. So this seems exciting. And let's move ahead, and can you walk us through the capabilities of your model?
Yeah, the model is actually able to perform a wide range of simulations. In fact, not only basic maneuvers are possible, but a lot of capabilities are implemented. Starting from the simple open-loop driver, we can perform ISO maneuvers, like ramp steers or sign steers, in order to have an objective evaluation of the car performances. In addition, we have closed loop drivers that allows us to perform lap-time simulation by following a given trajectory. Also, we have a seven postrig, where we can excite all the four wheels, plus, also-- emulate the aerodynamic forces.
Other than that, we have, also, flexible bodies that allows us to understand how compliances actually modify the car behavior. And thanks to that, also, it is possible to implement kinematics testrigs, where we can see the dynamic angles of the suspension and how every component is actually working. Last but not least, also, we have the control systems implementation. In fact, we have all the electronics behavior, and also, all the control systems implemented. And also, really, in the design phase, we can implement control systems and see how they actually perform.
OK, so I can see multiple model capabilities that you have. And I suppose that any student or any team who is looking for these kind of simulation-- your model covers all of these important topics. So with this, let's get started, and let's move to the software demonstration, which I'm really excited to see.
OK, perfect. So this is the actual Multibody environment. The environment is implemented thanks to the MATLAB project capabilities. In the MATLAB project, we have a lot of folders, but the most important one is the library folder. In fact, the Multibody is not only a simple Simulink model, but is a Simulink Library. In this way, we can implement a singular component, such as a steering system or other tools, and then-- and only then, propagate them in a specific Simulink.
The library is organized in a way to have a subsystem for each macroassembly present in the car. So we have, for example, kinematics, elastics, tires, or steering system. In this way, we can model each macro assembly, like-- as we have in the car and in the And then-- only then, assemble them in a full model.
So we can go through-- for example, the Sim system. Each subsystem is organized in this way. We have a block steering system that will be the one directly placed in a Simulink model. And then we have another subsystems called components. So in the first one, this system is actually a variant subsystem. In fact, different types of steering systems are modeled. For example, complete systems only rock, or they fix the-- or I fix the steering system. All these different variants are actually implemented in the component subsystem. In this one, we have each single-- we have each component specifically modeled.
Yeah, thanks, Nicoló, for going to your library that you have created. And I can see the amazing part is that each of these components-- you're having-- reading subsystem so that, depending upon the complexity, you have added multiple subsystems. Now, going ahead, can you also show-- what does that simple system or the complex system mean in this scenario? Let's take an example of the kinematic one.
OK, so we can go through all the variants that we have implemented for the kinematics. They are quite a lot, but for a specific reason. In fact, we have the simplest version that doesn't take into account what are the constraint reactions. And in this case, the-- which ones are attached to what is the chassis tends to only remote joined. We don't have to calculate an assembly. But we actually lose the ability to estimate what are the forces at the chassis.
This approximation is not done in the rigid kinematics. In fact, in this assembly, we have not a joint, but we have two spherical joints for each kinematic attachment. In fact, we have an assembly. It's slower to compute, but it gives us a lot more of information.
OK, perfect. And do you also have a flexible bodied kinematic system, or is it in a different one?
Yeah. In addition, we also have the flexible one. In this case, the main structure is actually the same. What it change is this component that is not, anymore, a simple wishbone, but is modeled using the flexible body's capability, built in Simscape. In this way, we can assign, to the body, what is a damping matrix, a stiffness matrix, and the mass matrix. In this way, we can simulate what are the compliances performing in the car.
OK, perfect, so for the flexible body, you have defined a mass and stiffness matrix. OK, perfect. That makes sense, OK.
So once all the singular components are implemented, we can finally assemble them in what will be the final car. Currently, we have two different models. The most used is the Multibody baseline model. It means this one is organized so that the left subassembly is the actual Multibody model, while the right subassembly performs all the post-process calculation in order to further announce what are the load signals.
So going through the actual Multibody model, we can see that every assembly is connected with others like it happens on the actual car. So we start from the World subassembly where we define all the car properties and all the main structure. Then we have all the subassembly interconnected, starting from the chassis. To the chassis-- are connecting both the steering system and the kinematics. To the kinematics are, then, attached what are the powertrain, which is composed by both the motor and the brakes. And finally, we have what are the tires that communicate directly with the ground that is defined in Simscape Multibody.
OK, so Nicoló, can you get into the types of system? I just have one question-- that what tire model you're using? And again, here, I can see variant subsystem, please.
Yeah, so like for the other subassembly-- also for the tire, we have variant types. We have the Pacejka, which is built in Simscape. And also, we have MF Tyre from Siemens. Lastly, we have what is a Setup Wheel that we use to perform kinematics analysis.
Perfect. So can we go inside, in one of the subsystems?
Yeah.
Let's take the first one, yeah. OK, so here, you're using the magic Formula block from the Simscape Multibody. So can you double-click on this column? I have one interesting and very common question, which is being asked by many students. So in this, we required the .tir format for modeling the tire. So did you do some kind of calculation or algorithm, did you route, to convert the raw tire data into a .tir format, or there was a different approach from your team's end?
Yeah, we used .tir format, and we get it directly from Pirelli. In fact, we have a direct collaboration with them. And we perform tests that-- where we can actually implement .tir format.
OK, perfect. Great. Thanks, Nicoló. I also have one question. I can see there are multiple parts that has been used in this. And these are also shown in your mask. So have you used a file solid block to import these parts individually, or you have directly imported the full CAD assembly?
Initially, we decided to import the card using the same mechanics' exporter. But it is a very fast approach to start from 0. But then we decided to start from scratch.
OK. And also, I'm curious to know that-- does your model also contain aerodynamic in this? And if it has, can you walk us through that?
OK, so also, for the aerodynamic package, we have different variant configuration. The most complex one measures what are the ride heights of the chassis relative to the ground. The ride heights are used in order to interpolate the aerodynamic forces maps that the aerodynamics department give us. Then we can also implement what is the DRS activation. And once the DRS logic is considered, we can directly apply an external force to the chassis so that we can emulate what are the aerodynamic forces.
Perfect, Nicoló, I think we now have a good idea of how your system works. And I remember you have also developed a MATLAB app for a user-friendly experience. So why don't we go through that? And then, after that, we can run the simulation and go through the results. So, yeah.
Yeah, we also developed an app, which is called Driver Go In. In this app, we can rapidly implement driving maneuvers, both open-loop and closed-loop. Open-loop maneuvers-- in the Open Loop tab, we can define time series of accelerator and brake pedals, and also steering angles, while, in the Velocity Reference, we can impose a velocity reference and also a sing angle. And then the velocity reference will be followed by a longitudinal driver.
OK, and so how have you developed the driver, in this case?
The longitudinal driver is the one that is already built in in the vehicle dynamic's block set. So it's a longitudinal driver, while we have also a driver capable of following a trajectory. In this case, it's fully built by us, internally.
OK, perfect. Yeah, let's go ahead. Yep.
For example, we can load a simple maneuver. So the selection panel-- open up. And we can select, for example, a maneuver. When we load the maneuver, the inputs will be displayed in the graph below, and all the settings will be loaded then. By selecting the Set as Current button, we can actually propagate the data directly to the Multibody model that we will perform.
So in that case, this app is helpful in the sense that you don't have to go to each of the subsystems and manually input the values, right? This app will do the job, right?
Yeah, exactly, instead of directly writing it manually in a script.
Yeah, perfect. So if you're all set, why don't we run one simulation to just see what output we are getting.
Then once we set up the maneuver from the app, we can actually run the simulation. A great advantage of the Multibody package is that you can actually and graphically see what the car is actually doing. So also, the debug time is also for the reduced.
Yeah, and similarly, I think you can perform different track simulations or closed-loop simulations as well. Yeah, so perfect. This looks great, Nicoló. And along with that, one thing is that we are having the simulation where you are visualizing this. But at the same time, the data that you need-- that can also be locked to different sensors, which are there in the Multibody, or if you're using different joints-- or joints are having sensors to sense the forces acceleration velocity and other parameters.
So Nicoló, can we do one more thing? Can we have one closed-loop simulation as well, just to have a look into some kind of track simulation?
Yeah, for sure. Apart from open-loop maneuvers, we can also perform closed-loop maneuvers. In this way, we can perform lap-time simulations of the various tracks that Formula Student is composed by. In this case, we are going to perform a simulation of Formula Student Germany
Perfect. So this is quite helpful. So with this-- we have covered the closed-loop simulation. We have covered the open-loop simulation. And you also walk us through the whole subsystem, how you have built it. So I remember, Nicoló, that you were also talking about the GGV plot that you have obtained, so would you mind going through that?
Yeah, for sure. We have the GGV diagram. In addition, the GGV diagram is actually created thanks to an automatic-- thanks to an automatic script so that we don't have to run a lot of simulation, but it's-- everything automatically done. This is done by this GGV script, which runs thanks to the parallel toolbox. A lot of simulations, once they are completed-- we get this xl, in which all the accelerations are overwritten. Graphically And then we can also graphically see what the diagram actually is, like in this case.
OK, yeah, I can see that the aerodynamics force or the download force is basically working so that you-- the envelope is growing as you're going upwards.
Yeah, exactly. With the increment of speed, we can maximize what are the lateral accelerations and the braking acceleration. But then we get to the point where we are power limited, so the acceleration are quite reduced.
Great, Nicoló. I think this is also important piece of information for the teams. So let's do one thing, which I'm also curious about-- is that you have showed us a lot of simulations. So have you also done any kind of validation to validate with the results that you have obtained to simulation?
Yeah, we also validated the model using ISO maneuvers. In this case, we can see what is a ramp steer maneuver, where the driver gradually increment the seeing angle. In this case, it's plotted-- the lateral acceleration, and we can see that the model represents the reality.
OK, yeah, I can see-- the simulation data that you have obtained is-- it's almost matching up with the data that you have acquired by logging. So I'm just curious, Nicoló-- the mismatch-- a little bit of fluctuation that we see after, maybe-- I would say, after 7 seconds. Any thought on this? What's the reason that, at that place, we are getting more fluctuation?
Yeah, all the validation process is actually focused on the input parameters because modeling the car is actually simple. What is of complex modeling is the parameter that we give to the Multibody model. In this case, we have that-- the Multibody model actually have a greater lateral acceleration than the actual car. I think that it's due to the modeling of the tires, which overestimates the capabilities of the tire.
OK, yeah. Yeah, that could be one of the reasons. Yeah, perfect, Nicoló. So we have discussed the results and how you have validated these results. So let's go ahead with the key takeaways that you want to share with the viewers.
OK, so after we have seen the model, I think that what we learned was the high versatility and accuracy of Simscape Multibody models. If they are approached in the right way-- this means using MATLAB projects and Simulink libraries and all the MathWorks capabilities-- the implementation process is actually simplified and available to everyone. Also, in the last slide, we also discussed the importance of correct input data in order to perfectly model the car.
Perfect. I like the point-- the last point-- that is inputting the correct data because even though you model-- and in case the teams or students are working in such kind of modeling environment, if they're not-- if they don't have the access of right, correct data, they should write that as a note in the model, specifying that there's a limitation, that the models-- the values have been estimated, or the way they have taken so that, in future, if someone is going to work on that, that person will be aware of what changes that person needs to do.
Perfect. So yeah, thanks, Nicoló, for going through your future plans, and all the best. And any time, if you need our support, feel free to reach out to us. You know our contact details. And for the viewers who are watching this video, you must be wondering that-- how do we learn? If you want to implement such kind of vehicle simulation, how do we go ahead with that?
So I would suggest-- if you're completely new, go through the documentation page, getting started with Simscape Multibody so at least you'll get an understanding of how you connect different bodies, rigid transforms, how you define the constraints. And further, once you are done with that, then you can-- there's a GitHub repository, and it's also available on File Exchange that's a vehicle dynamics 14 DOF model. So that will also give you more understanding. And further, then you have options.
If you are a student of a Formula Student competitions, we have a Formula Student Simscape Multibody vehicle model. And if you need the access for it, feel free to reach out at RacingLounge@MathWorks.com. And then we also have Simscape Vehicle Templates, which is a library that contains library blogs and configurable vehicle model that you can use for a wide range of vehicle design tasks.
So with this, we are at the end of the video. And these are the Racing Lounge resources. So multiple times, I mentioned the email ID. So this is the email ID-- RacingLounge@MathWorks.com. You can reach out to us with the queries-- And if you're also looking for the Formula Student Multibody model. And then if you're on Facebook, feel free to join our Facebook group.
And then there are multiple resources, like how we have this video with Nicoló on the Racing Lounge channel. So you can also access all the other videos by going through the student tutorials and videos link. And, then for software offers, please check out the link provided over here. And then you can also go through our Student Lounge Blog, where there are multiple technical blogs related to automotive, robotics, and aerospace, and other technologies.
So Nicoló, thanks a lot. Thanks for sharing your work with us. And all the best for all your future plans. And I'm sure that viewers are going to love this video and they'll get to learn-- and they're going to get motivated how to perform Multibody simulations using Simscape Multibody. Thanks a lot.
Yeah, thanks, everyone.


Select a Web Site
Choose a web site to get translated content where available and see local events and offers. Based on your location, we recommend that you select: United States.
You can also select a web site from the following list
Americas
- América Latina (Español)
- Canada (English)
- United States (English)
Europe
- Belgium (English)
- Denmark (English)
- Deutschland (Deutsch)
- España (Español)
- Finland (English)
- France (Français)
- Ireland (English)
- Italia (Italiano)
- Luxembourg (English)
- Netherlands (English)
- Norway (English)
- Österreich (Deutsch)
- Portugal (English)
- Sweden (English)
- Switzerland
- United Kingdom (English)