How to Extract Text from Scanned Documents with MATLAB
From the series: “How To” Video Series for Biomedical and Pharmaceutical Applications
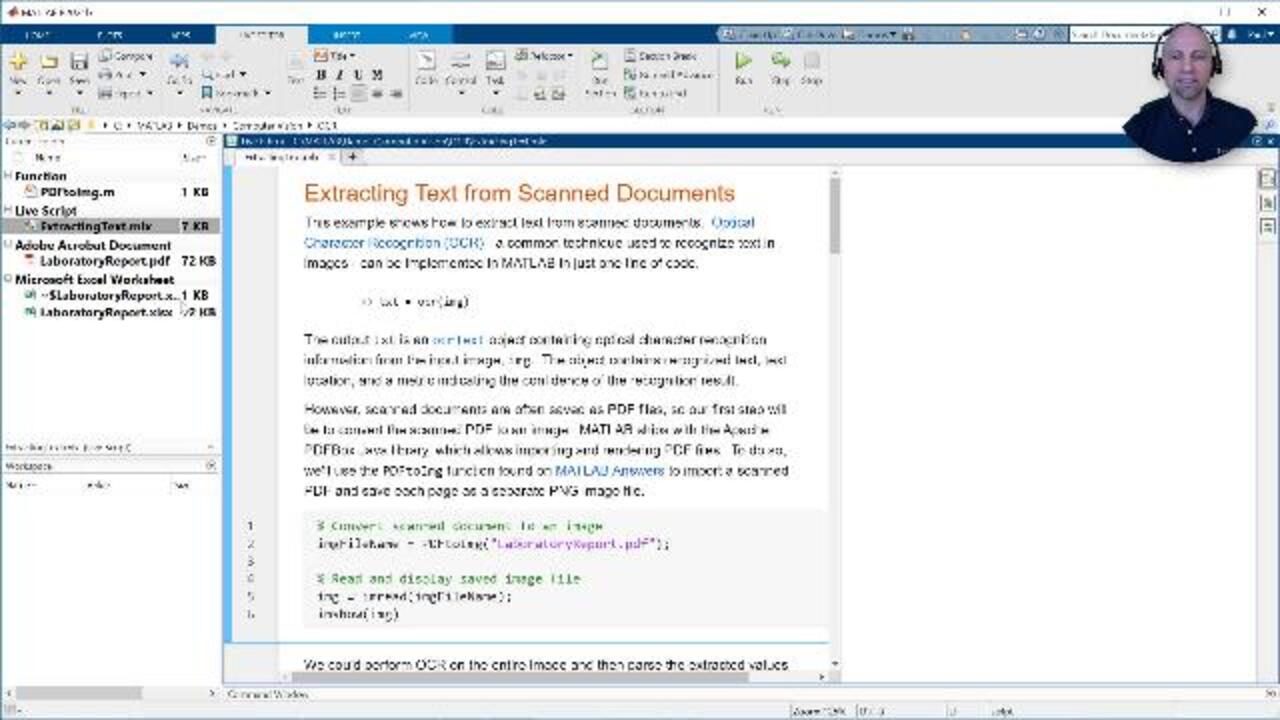
Learn how to quickly extract text from your scanned documents using MATLAB®. To do so, you’ll first see how to convert a PDF to an image, which will then allow you to perform optical character recognition (OCR) in just one line of code. The ocr function also returns properties about the individually recognized words and characters. You’ll see how these properties can then be used to locate and assess the confidence of the recognized text.
Published: 20 Mar 2022
Hello, everyone. Paul here from MathWorks. Today, I'm going to show you how you can use optical character recognition, OCR, to automatically extract text from a scanned document. Since most medical documents contain sensitive personal information, we'll be working with a mock laboratory report containing the health screening results for a fictitious patient.
Here you see the scanned document from which we'll be extracting text. In particular, we'll be extracting the numeric data in the Result column and storing it in a table along with the corresponding string data from the Test Name column. Since this is a made-up example, we'll also have access to the underlying data table that was used to populate the mock laboratory report. As such, at the end, we'll evaluate the OCR performance by comparing the extracted values with the actual reported value stored in this Excel spreadsheet.
Optical character recognition can be implemented in MATLAB in just one line of code. However, unlike extracting text from a native electronic document, to extract text from a scanned document, we must first convert the PDF to an image. MATLAB ships with the Apache PDFBox Java library, which allows importing and rendering PDF files. To do so, we'll use the PDF to IMG function, found on MATLAB Answers, to import our scanned PDF and save it as an image.
Once converted, we can view the resulting image using the imshow command. We could then perform OCR on the entire image and parse out the desired extracted values afterwards. However, you can often achieve better performance by focusing on specific regions of interest. Selection of these regions could be automated based on certain features in the image or performed manually using the imcrop command as you see here.
Since we selected a region that only contains numeric data, we can reduce the character set to ensure no numbers are mistaken for other characters. For example, depending on the font, zeros and ones can look very similar to uppercase O's and lowercase L's, respectively. And since we selected a small region, we'll also specify the text layout should be treated as a block of text, as opposed to a single line or word.
In addition to the recognized text, the OCR output object also contains information about the text location, as well as the metric indicating the confidence of the result. We'll use the bounding boxes to annotate our image with the extracted words to quickly check if the results look reasonable. We could also use the confidence scores to flag any words that may have been misrecognized. But in this case, all confidence scores were greater than 60%.
Since we restricted the character set to only numbers, the extracted string of words can easily be converted to a double precision array. Likewise, since we restricted the region of interest to a single column, the extracted values were read in order, which will make it easier to match the result values with their corresponding test names. To do so, we'll set a second region of interest to be the area to the left of the first region of interest.
This time, aside from specifying the region of interest, we'll use the default character set and text layout settings. Then we'll once again use the confidence scores to identify potentially misrecognized words. Notice this time, there is a word with less than 60% confidence. To better understand why, we'll also label the specific characters with low confidence.
Here we see the OCR has recognized what appears to be a comma, but it's not very confident about it. If we take a look at the original scanned document, we said there is indeed a comma-shaped mark at this location. This could be due to a scuff mark on the original paper copy or perhaps on the scanner glass. To protect against this, in the next step, we'll remove all characters with low confidence.
Notice in this case, there are multiple words per line. Since the "Words" array stacks all of these words into a single column, it's not straightforward to pair the complete extracted test names with the array of result values we extracted earlier. Fortunately, the OCR output also includes a "Text" property which maintains the text layout, including new line characters. As such, it can be split line by line. And the lines that do not contain results can be removed.
We can then easily combine the extracted test names and corresponding result values into a single table. We'll also read the actual reported values from the spreadsheet we saw earlier and compare them to see if they match the values we extracted from the scanned document. In this case, since we removed text characters with low confidence, all of the extracted values matched the actual reported values.
I hope this quick demonstration illustrated how you can use computer vision to begin extracting data from your historical documents. For more examples, including how you can train a classifier to recognize custom fonts or handwritten characters, please visit the Optical Character Recognition Help page. Thanks for watching.


Select a Web Site
Choose a web site to get translated content where available and see local events and offers. Based on your location, we recommend that you select: United States.
You can also select a web site from the following list
Americas
- América Latina (Español)
- Canada (English)
- United States (English)
Europe
- Belgium (English)
- Denmark (English)
- Deutschland (Deutsch)
- España (Español)
- Finland (English)
- France (Français)
- Ireland (English)
- Italia (Italiano)
- Luxembourg (English)
- Netherlands (English)
- Norway (English)
- Österreich (Deutsch)
- Portugal (English)
- Sweden (English)
- Switzerland
- United Kingdom (English)