Part 1: Automated Labeling and Iterative Learning
Overview
In this session, we introduce the labeler apps and discuss ways of extending these tools to facilitate labeling data to build AI models. We describe the use of preprocessing to facilitate the extraction of information from signal/ images, and present approaches to building models in an iterative fashion, validating predicted labels and incorporating on-the-fly models to label more and more data.
Highlights
- Using and Extending the Image and Video Labelers
- Preprocessing to facilitate image labeling
- Iteratively building and incorporating computer-vision and machine-learning models
About the Presenter
Rishu Gupta is a senior application engineer at MathWorks India. He primarily focuses on image processing, computer vision, and deep learning applications. Rishu has over nine years of experience working on applications related to visual contents. He previously worked as a scientist at LG Soft India in the Research and Development unit. He has published and reviewed papers in multiple peer-reviewed conferences and journals. Rishu holds a bachelor’s degree in electronics and communication engineering from BIET Jhansi, a master’s in visual contents from Dongseo University, South Korea, working on the application of computer vision, and a Ph.D. in electrical engineering from University Technology Petronas, Malaysia with focus on biomedical image processing for ultrasound images.
Recorded: 21 Jul 2021
Thank you for coming to deep learning webinar series, first part. My name is Rishu Gupta, and I work as a senior application engineer at MathWorks, with our focus areas around automated driving and artificial intelligence. Now, before going deeper into our today's topic of automated labeling and iterative learning, let me just first give a brief introduction about deep learning webinar series.
So in this deep learning webinar series, we have four sessions. The first session is today, which is around automated labeling and iterative learning, followed by a couple of sessions on designing experiments and advanced neural network architectures. Then fourth part of this series, we will be talking about automatic CUDA code generation, and deployment of these generated code onto Nvidia Jetson or other Nvidia chips we use.
As a next to this particular deep learning webinar series, we also plan to have hands-on deep learning virtual workshop, which will be by invitation only. You will have Qs in the discussion today itself. And you can answer to those Qs, and you can become part of that deep learning workshop as well.
Now, to start with on our webinar series, let's get started with what is deep learning. Deep learning is a key technology that enables artificial intelligence megatrend. What is artificial intelligence? Artificial intelligence is a technology that enables automation or that enables machines to work as humans.
There are two key enabler technologies for artificial intelligence-- machine learning and deep learning. Both machine learning and deep learning uses statistical methods to train models on-- with the help of numerous amount of data. The basic difference between deep learning and machine learning is, deep learning uses extremely large neural network architectures to learn from the data and train the model.
Now, with the growth of deep learning, we have seen the deep learning usage being in across multiple industries. These are just a few of the high-level applications where deep learning models are used across industries. One of the interesting unifying themes is that the data in these problems is not only images, but it could be signals coming from different sensors, like microphones, radars, RF receivers, accelerometers, sensors, vibration sensors, and all. And across the world of predictive models in use are increasingly shifting towards adopting deep learning technology.
Now, let's just quickly see a few of the quick examples where deep learning applications have been used, and where users have used MATLAB end-to-end to establish deep learning framework. Now, at MathWorks, we are seeing multiple applications being developed across industries. For example, LG Chemicals, they developed a condition monitoring system using anomaly detection to avoid wasteful maintenance as well as unexpected failures.
On the other hand, Vitesco involved reinforcement learning to conform to more stringent emission laws for their powertrains to tackle global climactic change. Third, Mitsui Chemicals integrated TensorFlow models with MATLAB applications to automate the visual inspection of their products. Other use case, AUTOLIV used and automated their LiDAR point cloud annotation for their sensor verification.
So deep learning is being increasingly used across multiple industries and across multiple different applications. And multiple industries are already adopting deep learning as their go-to technology to solve many such problems. Now, while we are working on many of these numerous applications, there could be different kind of data that we may be working on. The data could expand from images, videos, or signals coming from the speech data or audio data. Or it could be numeric data coming in from multiple sensors.
You could be working on text data doing natural language processing, or also you could be working on point cloud data, where you wanted to understand what individual object in the scene looks like. Now, what question comes to our mind-- how does deep learning cater to all these different kind of data sets and different kind of the problems?
The answer to this question particularly lies in that deep neural network architecture itself. The deep neural network architecture consists of input layer, there are hidden layers, and there is an output layer. Now, the input layer is what you will feed the data in the form of the numeric values. Now, numeric values can be coming in from the pixels, from the images, or it could be the data coming in from sensors.
Now the information from the input layer gets propagated to all the hidden layers and then finally converge towards the output layer, which is the final classification or the kind of application you are going to work on. So given this robust architecture of deep neural network, we can see deep learning being used increasingly across domains, across different kind of data types.
Now, to enable all these awesome applications, if you look at the deep learning workflow, the unified deep learning workflow may look something like this. The first thing that we may need to do is data preparation. Second thing could be modeling of the neural network architecture. Then once we are happy with the neural network architecture modeling, we may want to go ahead and deploy our models to different systems.
Now, one interesting factor is, this is not a one-time approach. It's an iterative process, wherein you may want to go play around with your data, play around with your models, and try to see if the model that you are generating is fitting your memory footprint requirements, performance, and lot of other factors. So you go back and forth between multiple times between your data, hyperparameters, as well as neural network architectures, to get to the robustness and accuracy that you are looking at.
Now, when we look at this unified deep learning workflow, there are three stages-- data preparation, AI modeling, and deployment. That also explains the rationale behind having four-part deep learning webinar series.
First focuses on the automated labeling and iterative learning. Second focuses more on designing of the experiments and advanced neural network architectures, like conditional GANs and many more. And then the fourth part talks about, once you have built your model which is robust enough, and you want to deploy the model onto an embedded platform, how you can quickly go to prototyping and deployment of your applications onto embedded platforms. And particularly, we will be talking about Nvidia GPUs.
Now let's get this started with the first part of the series, which is data preparation. And in data preparation particularly, we are going to talk about ground truth labeling. Now, starting about labeling itself, when we are trying to label the data set, data could be coming in from multiple sensors. It could be coming in from camera in the form of images, in the form of videos, or it could be coming in from mic in the form of a speech data, or it could be coming in from multiple different sensors.
And to label all the data is extremely hard and tedious job. I am coding on Andrej Karpathy, here, who mentioned that during his PhD days, he spent 90% of the time while working with the models, because he was working to find a better predictor. However, when he became the director at Tesla, he mentioned that 75% of his time goes into the data set, because now he was not making a high-performing predictor. Rather, he was trying to make an algorithm which can autonetwork, which can work well for the cars.
Now, like we talked, when we are working on deep learning applications, there could be different kind of the data we may want to work on, like images, signals, numeric data, point cloud data, and many others. Now, at MathWorks, to cater to all these different kind of the data set labeling requirements, there are a lot of apps that we have introduced. And we will talk about all of these apps in detail today as well.
Some of the apps that I want to highlight is Image Labeler, Video Labeler app when you you're working on image or video data; Ground Truth Labeler app when you are working on automated driving applications, and you want to work on synchronous camera as well as LiDAR point cloud data; Audio Labeler app, Signal Labeler app when you are more focused towards sensor data or doing time series data or audio and the speech data. And LiDAR Labeler app is when are working specifically on the point cloud data.
Now, today's objective for my discussion is to demonstrate how you can automate some of your labeling tasks as well. Labeling is tedious, time-consuming, and extremely important. We all understand that. But could there be a way wherein we can automate some of our labeling tasks?
And in the process of showing you that, what I will be also doing is, I'll be also equipping you with some of the custom tools that can make your labeling effort a lot easier. And in the entire process, I will try to encourage you to think about labeling as an entirely different activity, not just getting an image or a signal and to start to label it. Consider it more as an algorithm development kind of an approach, and we will see how incorporating algorithm development into your labeling task can help you increase the automation of your entire labeling task.
Now, this is a high-level picture of what we are going to see today. This is our Image Labeler app, wherein I have incorporated all different images that I wanted to label. And I have also used some automation algorithm to automate the labeling process. Once I incorporate that automation algorithm, I can just click Run. And this recursively goes ahead, runs the algorithms, and automates the bounding boxes for all these different kind of the data.
Now, in this particular image or application, the data that you are seeing probably is not as realistic or as close to the data that you might be working on. But all of the different use cases, all the techniques that we are going to talk about today, are going to be very-- are very relevant for your applications and use cases as well.
Now, let me quickly go inside my MATLAB itself and work around on some of the demos that I have built there. Now, the first thing that I wanted to show you is the Image Labeler app. So let's get quickly started with the Image Labeler app. Now, inside Image Labeler app, you can import the images in the form of a data store, which could be a lot of images that you may want to work around for your labeling task.
Now, one of the things that you can quickly do inside the labeler app is you can just go ahead, define the labels that you wanted to label, and also the kind of a label that you wanted to label. It could be a line label if you are going for lane kind of labeling. It could be a pixel label if you're working on semantics segmentation applications. It could be a polygonal label, or it could be a projected cuboid label.
Let's start quickly with a rectangular label. Now, I can define the label name, type of label, and I can just close this. As soon as I did that, the car label populated inside my ROI labels.
I can also add sublabels and attributes to any of the labels that I wanted to have. Now, once I have defined my label, I can quickly start to go ahead, navigate within my labeler app, and quickly start to label my objects. Now, what I'm doing here is minor labeling, which is extremely tedious. And it may be OK for me to do if I'm just labeling tens or hundreds of images.
But while we are working on deep learning, this is really the case-- in most of the cases, we may be working on thousands and thousands or millions of images. And manually going ahead and labeling millions of images is never a fruitful or productive work. So now let's go ahead and a little bit look more as to how we can incorporate automation within the labeler app, or how we can build some algorithms which can help us in the automation.
Now, in this process I'm going to introduce one of the tools that I have built, which is called as an Autobound. Now, what Autobound does is, it takes in the image which you wanted to label, and the preprocessing function which you wanted to use for labeling of the image.
And default, what it also does is, I have implemented a clustering mechanism which clusters the image into a number of bins that I have provided. And as soon as I click on a seed point, or I click on a point in an image, it will draw the bounding boxes across the image with that cluster. And you can have multiple objects labeled there as well.
Let me go ahead and demonstrate, which will make things more clear. Now here, what I'm going to do is I'm just going to incorporate or call in one of the images, which is a stop sign image. Now, with this stop sign image, I have also called in something called as an Impixel Info, which will give me information around the location as well as the pixel value.
So if I go inside this red section itself, you will see the pixel values are significantly changing, and they are not constant in one color itself. So now what I am going to do is, I'm going to show you if you perform a clustering on this particular image, what image-- what it may look like. So once I perform a clustering on this image, like default I'm using 15 clusters here, and what we will see is that I have a good amount of segregation now already happening inside my different objects.
Now let's say I want to use Autobound function and the label matrix underneath as a preprocessing function to automate the labeling process. Now what I'm going to do is I'm just going to call this. And what this Autobound function will do is, as soon as I click at any point here, it will automatically cluster the image in those number of clusters and draw the bounding box around the cluster that I have incorporated the seed from.
Now I can go ahead, and I can do the labeling for other objects within the image. This could be very precise. And if I wanted to do the labeling for a smaller sections also, I can do that.
And once I'm done with the labeling here, what I can do is I can quickly just do the right-click. And as soon as I do the right-click, my labeling task is complete. And I have all these bounding boxes labeled and captured inside my workspace as BBS.
Now, the question may come to our mind that, not all the times I'm going to label same kind of an object. There could be many times when I'm labeling different kind of objects inside the scene. So can we call this Autobound function to label different kind of objects? Yes, we can.
And here in this particular use case, I'm doing exactly that. So here, there are two different kind of objects. One is nickel and dime. Now I can just do click, click, click, click, click, and click. This will help me to label all the nickels. And once I'm satisfied with all the nickels, I can just do right-click and, again, call my Autobound function for dimes. And once I'm done, I can do right-click.
So now, with one Autobound function, I have used it to label one kind of an image. And I also use it to label an image wherein I have different kind of objects. Now we are approaching towards an automation. It's not yet an automation altogether.
Now, some-- many of the times, we are not only working on these simple images. Many of times when you are working on real scenarios, the images could be slightly or extremely difficult to work on. Let's take another use case.
Here I have just called as an onion image. If you are familiar with MATLAB and image processing in MATLAB, you must be familiar with this peppers image. Now, if I click anywhere in this peppers image, you will see it is able to capture this onion but not entirely, or not to the level which we would want it to.
So what we can do now? So now to address this, I'm going to open something called as a Color Thresholder app inside MATLAB. And who is-- some of the folks who are not aware about the apps inside MATLAB, you can go inside Apps in MATLAB, and as soon as you click on the dropdown menu, you will see a lot of apps.
Now, I have all the toolboxes installed, so I have all these apps available. If you have image processing and computer vision toolbox available, then you will have these many apps in your workspace or in the apps section. Now, some of the apps that are available and can help you to quickly create mask for automation is Color Thresholder app, which does simple color thresholding based on multiple different color spaces, or it could be Image Segmenter app, where you are using advanced level-- advanced segmentation techniques, like a snake-based algorithm or graph coloring algorithms to do the segmentation.
Now let me just quickly go ahead run this section and invoke the Color Thresholder. Now, as soon as I invoke the Color Thresholder app, you can see the different color spaces which can be visualized directly with the help of the scatterplot. Now, let's say I go ahead and choose one of the color spaces, YCbCr, for this particular image.
As soon as I chose YCbCr, I can go ahead, and I can interactively in multiple ways define the boundary or select the threshold for my image. Now here, I can just draw this kind of freehand label to like an image to see whether I can segregate onion or not. Now I have done that pretty good.
Once I have done this kind of labeling inside-- once I've done this kind of thresholding inside the Color Thresholder app, I can go inside the Export. And I can either export images, or I can export function.
Now let's say I exported a function. As soon as exported a function, all the things that we have done inside the app interactively gets captured here. Now, I already have a prepopulated function that I have implemented here. Let me just open and show that function to you.
Now, what I did was I used the Color Thresholder app to create this particular function. And I also modified this function to include the morphological operation opening, because why not? Because I have a lot of tools inside MATLAB for image processing to incorporate and do a lot of cool stuff with my images. So I use Color Thresholder app to create a function for me, and then quickly use the morphological operation of opening to better refine my label or the bounding box.
Now, what I did here was I created-- I created a function for my image. Now, how I can use that function inside either the Image Labeler app or inside my Autobound function?
Now, before going there, I want to quickly introduce something called as a function handle concept. Now, at the outset function handle may look a little tedious to understand. But these are extremely easy and can be understood very easily.
So now let's say this is a function f of x y is equal to x squared minus y squared. If I wanted to define this function, what I could quickly do is f is equal to at the rate-- this defines the function handle-- pass the argument which you want as an input inside the function, and just define the function itself. Now, f at the rate x y x squared minus y squared implements a function x squared minus y squared, which is a factor for x and y.
Now, to call this function, I can just provide f, and x and y values. And you can see that onset of 16 minus minus 7. Now, I can create my own function as a function handle, or I can create a function which is already-- I can use the function, named functions which are already available inside MATLAB.
Now here, what I'm using, Imbinarize is a function which is already available in MATLAB with multiple different parameters as a named function. Now, let's say if I want to go ahead, and I use-- I want to use this particular function. I can just click this. And you see this is a rice image.
And this rice image is doing the binarization based on the default parameters. And you see here not many of the rice are being captured. Now what I can do is, I can quickly go back, and I can choose to use the adaptive method of Imbinarize. So I'll define a new function under here. I can click OK. And now you see a lot more rice are getting incorporated.
So with the help of function handle, not only you can define your own functions that we have done, like create our own mask, you can also go ahead and use any of the named functions which are already available in MATLAB.
Now, let me go ahead and use this function handle that we have created for create onion mask inside the Autobound function. So what I'm doing here is I'm doing create onion mask and putting this function inside the function handle. I can click OK.
And you see here I will now go ahead and click on onion, and it will give me a very good bifurcation of the onion itself. So now what I have done is I used-- I created a function handle for the function which I created with the help of the Color Thresholder app, used that function inside the Autobound to automate or effectively label some of the data set.
Now the question comes, how can I go ahead and incorporate these function handles inside my Image Labeler app? Now, for that I have written a custom script. I'll not go into the detail of this script, but it's easier to write. And I'll be talking about some of these scripts when I'm talking about automation and some other algorithms for Video Labeler app.
Now, once I have my mask, once I have my automation function, I can just create a new session here. And within the new session, I have already preloaded some of the images as well as the labels that are associated to those images.
Now what I can do is, let's say I wanted to label a nickel and dime. So I can go ahead and I can select-- I can click on the Select Algorithm inside Automate Labeling bar. I can click on Image Function Handle Specifier. I can click on Automate.
And as soon as I click on Automate, I have this function or a tab saying Settings. Inside Settings, right now I see it is selected as Autobound. Let's say I'll go ahead and I'll do Done, and I'll click Run.
As soon as I click Run, I can go ahead and I can start to label my nickels. Right. I can do right-click. This is done. I can accept it. Now, once I have accepted it, I want to go ahead and I want to label time. I can again go ahead, I can choose the Automate function. But you get the concept.
Now let's say I wanted to incorporate some of the functions that I have created inside the function handle. Now I can go to onion. I can click on-- just a minute. I cannot-- I need to go back and select the onion image. I can click on Onion here.
And once I have selected Onion from my labels, I can go quickly on the onion image. I can click Automate. And once I click Automate, I can go inside the settings. And inside the settings, now what I can do is I can take my function handle that I have created here for the Autobound function.
I can go back inside the labeling session. I can do Done. And I can quickly run this. And once I run this, this will in the background use the models that I have created inside the Image Labeler app to automate the labeling process.
Now, it's still not entire automation. We are approaching that. But right now what I want you to understand is, you can go ahead and you can use many of these automation-- many of these preprocessing techniques, technologies, and build your own mask, which then can be used for automation of your entire algorithm.
Now, let me go a little bit deeper and take you on the path wherein we can entirely automate all labeling process. And for that, what I'm going to do is, I'm going to open one other application on which one of my colleagues is working on. Now, if I show you the kind of application and objects he's working on, this is a robotic application where he wants to teach a robot to pick any of these objects from the table.
Now, to do this he wants to use artificial intelligence. And to train artificial intelligence neural network, he needs to have a lot of table data. And he has a lot of images, and labeling individual images is not a simplistic task. And it's not productive altogether.
So we worked along together to create some of the automations to autolabel the data set. Now here, what I'm doing in the first section is I'm using Autobound itself and see if my Autobound function works out of the box or not. So I can click this section. I have all these images. Let me see. OK, not very good, not very good, good enough, not so good, no.
So what I can see, the Autobound function that I have out of the box works well for some of the images, but it doesn't work for many of the images that I have in my scene. Now, how can I make my function robust or use some of the-- build some of the masks, which can then be incorporated inside the automation algorithm?
Now, again I'm invoking Color Thresholder app here. But I'm going to show you a different feature and a capability inside Color Thresholder app. Here I'm going to select the HSV color space. And once I have selected HSV color space, I can see the scatterplot, I can see different components where I can just play around and modify the threshold.
Let me just go ahead and quickly start to do the labeling. So here, I can just start to select the blue section, which I'm expecting for my aerator, as well as for a cup. And you see quickly I'm able to segregate both the cup as well as the aerator, which gives me a very good mask to segregate these two objects from the scene.
Now, another object that I have in the scene is the membrane. So I can quickly start to see if I can also do some kind of automation or build a mask for my membrane. Yes, absolutely.
And these kind of interactive ways to help you build a mask actually accelerates a lot of your development process itself. Now, if I quickly go inside the Export button again, I can go ahead and export my function, which can then be used for automation, or which can then be used as a mask inside my Image Labeler app for automation.
Now, I have created some of these masks already, so I'm just going to use the masks that I have created here. And I'll run this section. Now, what this section does is, it runs those all three masks iteratively to find these different objects in the scene. And once it does, it uses the bounding box function to just autolabel the bounding boxes around those objects.
So now what we are quickly approaching towards is, we started with just labeling of the one object for a simple thing, to labeling multi-objects within the image. And it's getting more complicated with lot of function handles. Great.
Now I'm using the same function handle without Autobound function, and I'm selecting a seed point to label the data. Now I can select the aerator. Once I have selected the aerator, I can go ahead and I can select the membrane, mug. And you can see now the objects being labeled much accurate as compared to what we were labeling when we were using our default Autobound function. Right.
Now this, all is good. But how can we incorporate or bring all of this inside the Image Labeler app to automate the labeling process altogether? Now, here is some where I have created different function handles that I can incorporate inside the labeler app. That's done.
I can invoke the Image Labeler app session. And once the session is invoked, I have prepopulated all the images as well as the labels that I may want to label here. And let's see, once all this is done I have selected few images here to label. And I'll go inside, select a function handle. I can click on Automate.
And once I click on Automate, I can go back inside my settings, use the function handle-- let's say I'm doing it for torus. So I can use this particular function handle that I created with the help of the Color Thresholder app. I can go back inside the Autobound to Done. And then I will go inside the Color Thresholder, click Run.
And now I can start to go ahead and label my torus image. So this is done for the first image. I can click on the second image, done, third image, done. And as soon as I'm done, I can just accept it. And I can, again, repeat it, repeat it for all other objects in the scene.
Now we are approaching towards automation. Right now we are labeling multiple objects in the scene with multiple different function handles that we have created. Now, let me go ahead and create one function which I can use to automate the entire labeling process itself now.
And I want to show you the implementation that I did for One function. And in this One function, what I'm doing is, I have quickly trained some of the ACF detector algorithms. And when I talk-- when I say about training some of these algorithms inside MATLAB, there are out-of-the-box functionalities available to train multiple kind of object detectors. Train ACF is one of them if you're interested in training faster CNN, or if you're interested in YOLO v2 object detectors, or SSD object detectors, all those are available out of the box. You can use any of these to label the-- to train your AI models.
Now here, just for the sake of simplicity, I have trained these object detectors with 50 images. But these 50 images also, they are giving me a quite good labeling task altogether. And with all these detectors, I'm calling in these masks to automate the labeling process.
And what I'm doing here is I'm using the detector to delineate the object itself, and then I'm calculating the centroid of that object as a seed point to automate the seed selection process as well. And once I have the seed, I will use the function handles that I have created to quickly do that throughout the bounding boxes.
Now, let me just run this. Now, this is just pausing for a bit. And you have all these different objects automatically labeled with no manual work done for labeling itself. I agree, we have done some bit of a task to automate the labeling process altogether. But that was the intent, to show you that labeling of an object could be an entirely different-- can be done with an entirely different approach and incorporate a lot of automations with the algorithm development task itself.
However, this is what I had done, was just for one image. If I wanted to quickly go ahead and label all of my images inside the labeler app and automate the entire labeling process itself, so I have, again, preloaded my session. I can select quickly all the images that I have here. I can go inside my function handle. I can click on Automate.
Once automated, I can click on Settings. And inside Settings, what I can do is right now I can just add the One function that I have created for automation. Click OK and Run. That's all. As soon as I click Run, it will go ahead, run on every images inside the labeler, and it will entirely automate the labeling process.
Once you have built an algorithm development, you have designed your algorithm, you have incorporated your algorithm for incorporating it inside Autobound function, that's all you need to do. And then that automation can be done automatically from there on. And once I'm happy with all the labels which are associated here, I can quickly go ahead do Accept. And once Accept, I can go ahead, and I can export the labels and use it for training my AI models altogether.
That concludes my first demo. Let me quickly go back to my presentation slide and do a quick recap of what we have done until now. So what we have done is, I have introduced an Image Labeler app, with the help of which you can start to manually annotate objects if you have a limited number of images. We have also shown how we can extend the labeler apps with our custom class or function handles that we have created to automate the labeling process altogether.
Also, we have discussed how preprocessing and building some of those masks and algorithm development can help you make the labeling task easier. We also showed how you can autogenerate some of those detectors and incorporate them inside the labeler app to entirely automate the labeling process.
Now, before going any further, I would request you to answer one of the questions for me. Where would you put yourself while working on the artificial intelligence systems? You are actively working on a project; you are looking forward to working on an AI project in a few months; or you are acquiring knowledge in respective area to build confidence; or none of the above?
I request you to please answer the poll questions, as you will be also identifying some of the prospects for hands-on deep learning workshops from these poll questions. Not entirely, but this will weigh in a little as well. The poll question will be up for you for another minute. In the interest of time, I'll go ahead.
Yeah. Now, we talked about automation of the algorithm wherein there was a lot of preprocessing involved. But the entire AI community is doing a lot of awesome stuff all together. Now, how can we use some of those awesome stuff and build our automation algorithms seamlessly?
Now, here I want to introduce one of the topics called as interoperability. Now, what interoperability allows you to do in MathWorks is, if you have a model trained in different frameworks, let's say TensorFlow, or TensorFlow Keras, or Caffe, you can bring those models inside MATLAB. Or if you are working on a framework like PyTorch, MXNet, TensorFlow Keras, or ML Chainer Toolkit, which supports our next framework, you can bring the models trained in these frameworks inside MATLAB.
And once these models are inside MATLAB, you can use it for multiple other tasks. It could be starting from automating the labeling process, or you want to understand why a model is behaving in the way it is behaving, or it could be transfer learning, hyperparameter tuning, or code generation.
We are going to look at two different components today-- labeling as well as code generation. Let me go inside the Video Labeler app and show you how you can automate the labeling for semantic labels as well as the bounding boxes. Right. Now, inside the Video Labeler app, to invoke the Video Labeler app, you can just type Video Labeler app-- Video Labeler onto a command line.
Inside Video labeler app, you can quickly add videos, which you wanted to label. And once you have those videos inside the Video Labeler app, you can navigate through these videos, visualize how the video looks like, chunk out a section of the video that you wanted to label, or the entire video. You can define your labels, different types of labels depending on your application, click OK. A lot of sublabels, attributes also can be different depending on the application.
Now you can start to annotate your objects manually frame by frame, or you can also start to automate the labeling process. Now, for automation I would-- you can go inside the Automate Labeling section and click on Select Algorithm. Once you click that, you will see a host of options here. I should have done this with only supported right now.
So if you see here, Lane Boundary Detector is here, Vehicle Detector, People Detector, Point Tracker, and Temporal Interpolator. These are some of the apps which are provided-- these are some of the functionalities which are provided out of the box for automation. If you are doing automation for boundary vehicle or people, you are already all set. You will just need to do the parameterization of those detectors. If you are working on more generic problem statements or objects, you can use Point Tracker or Temporal Interpolator. I'll show you what Temporal Interpolator does.
Now I can go ahead and I can select Temporal Interpolator-- sorry, Point Tracker. And once I have selected that, I can click on Automate. Now once I click on Automate, I can go inside the Settings and choose what kind of feature extractor algorithms I want to automate the labeling process.
Now, what it does, it extends the feature points from these bounding boxes and tracks those features with the help of Lucas-Kanade or optical flow algorithm. And what you see here is we have done the labeling in one frame, but it gets propagated to all the different frames and automated. Once the entire labeling is done, you can export the labels and use them out of the box for your training of the AI model.
Now, one other thing that I wanted to show you is here, what I'm doing is, I am again importing the video that I wanted to label. And now, I am not going to choose at the intersection of the video here. I'm going to choose just a section of the video. I've defined a lot of labels. And I'm going to select some of the automation algorithms that I have implemented.
Now what you see here are some of the pretrained network, which I have imported from either TensorFlow, PyTorch, via ONNX, or directly inside MATLAB to automate the labeling process. I have imported YOLO v4 model for labeling, as well as EfficientDet model for labeling.
Now, and to import any of these labels, what you can do is, there is this section called as Add Algorithm. So there are few algorithms which are provided out of the box. Then there is a section called as an Add Algorithm, which will allow you to add as many automation algorithms as you want.
Now I'll show you what quickly add algorithm means, directly with the relevant use case which I have used. Right. So the automation algorithm, the template that you get, requires you to modify, make minor modifications inside the template, to get started with the automation and incorporating that neural network inside the labeler app itself.
Let me show you one of the works which I have done to incorporate YOLO v4. So now the first thing that I did is, I defined some of the user directions which I want the user to be enabled about or know about while labeling, some of the predefined variables. Then this function, this function that you are seeing here, is actually checking the label definitions, whether the label definitions that you have defined inside the labeler app are same as the label definitions which are defined inside the pretrained model or not.
And then once you have checked the label definition, then there is a function called as Initialize Function, where I'm loading a pretrained network. And then finally, I'm using that pretrained network to-- with the help of Detect YOLO v4 function to do the inference for me and get bounding boxes and labels, and put those bounding boxes and labels inside the Autolabel function, which can then be directly printed and exported wherever from the labeler app.
Now, once I have this, I can go ahead and I can use YOLO v4 COCO inside-- and this is trained on MS COCO data set. So I can click on Automate. And once automated, I can just click on Run. Now I am doing entire automation with the help of the pretrained models which are already available in the public space.
So here you can see the cars and trucks getting autolabeled. But if you have other different labels as well, you can just define those labels, and you can start to do the automation. Now, here you see the labeling which is happening is not very fast. And the reason is because some of very heavy pretrained models are slow to do the inference depending upon the compute resources you have.
So to accelerate that task entirely, there is something called as code generation that we can do in MATLAB. I'm not going to go into detail of code generation. I'll give you at the high level.
So what code generation will do is, with the help of code generation, you can automatically generate the code for pretrained network. You can define the configuration about what kind of code you want to generate-- whether you want to generate a MATLAB executable, or a static library, dynamic library-- what kind of language you want to target, what kind of library you want to target. If you're running Nvidia GPUs, either CUDA or TensorRT. And then you can just call in codegen, which will generate the code for this particular function for you.
Now, once I have done the code generation, I can bring this code generation or generated max file, which is YOLOv4predict_max generated by the codegen process, and do the inference with this generated code. Right. Now, once I'm happy with the code generation, the max file that I have, I can go ahead, and I can incorporate that, again, within the automation template which is provided.
Right. So now here, I have done the code generation. I am calling the C/C++/CUDA code build mix wrapper to do the automatic labeling for me. I can go inside Select Algorithm. Once my template is all set, I can go inside Select Algorithm, select the YOLOv4_max and do Automate.
And now I'm running the inference and automated-- doing the automated labeling significantly faster. I'll say it depends on the compute resources you have. But the acceleration would be tremendous once you do the code generation. And you can automate the entire labeling process with the help of pretrained network that you have.
Right. And once the entire labeling is done for you, you can quickly go ahead. You can export the labels, accept those labels. You can export the labels for training. Right.
Now, many of times, you are not working only on the object detection. You could be working on semantic segmentation itself. So for that, you can-- within the same session, you can go ahead and define different models, different classes like sky and road for labeling. And you will see there a lot of prebuilt functionalities to do the semantic labels.
But since we are talking about automation, here what I am going to do is I'm going to incorporate road and sky semantic segmentation network that I have made. Now, the automation algorithm that I'm going to use for road and sky segmentation is not very accurate. And the reason being, I just wanted to show you that the automation pretrained network or a network that you are bringing in depends upon-- the labels proposed by that automation network or a pretrained network depends on the accuracy of that network. If that network is 100% accurate, you will get the labels which are 100% accurate.
So in the case of pretrained YOLO v4, we were getting very high-quality bounding boxes. But the sky and road semantic segmentation that I have trained is not, out of the box, giving you good accuracy. So you can just stop the labeling, and you can go ahead and do a modification of the proposed label inside the app itself.
And once you are happy with all the semantic labels and the bounding box labels, you can go out and you can export those labels and use it inside your automation algorithms-- or the validation of the perception or AI tasks. And the modification that we needed to do, whether we are going for semantic labels or bounding box labels, is exactly the same.
You give user directions, you provide some variables that you are going to use in algorithms, do check label definitions, initialize the pretrained neural network that you want to incorporate, and run that neural network with the semantic seg and assign the labels back to autolabels. And that's it. Once this is done, your labeling process can be entirely automated.
So now what we talked about was the Video Labeler app and Image Labeler app. But many of times, you could be working on automated driving kind of an application, or many other application, where you are not working on image data, video data, or point cloud data. You could be working on simultaneous LiDAR and point cloud data, as well as the camera data.
Now, to address that, we have something called as a Ground Truth Labeler app. And inside the Ground Truth Labeler app, you can bring in both the image data as well as the point cloud data synchronized. And once imported, you can visualize both the camera as well as LiDAR sensor data simultaneously.
Once the visualization is done, you can interactively start to manually autolabel the data set, define saved labels and all if that need be. Similarly for point cloud, you can go ahead, and you can modify, go inside, outside, zoom in, zoom out, and very precisely start to label your point clouds as well. And with the new feature that we have in 2021a release, you can just label the bounding box in one sensor frame, and you can automatically backproject it in the other sensor frame. So you can do the 2D bounding box in camera, and you can backproject as a 3D bounding box inside the LiDAR point cloud.
Now, within the Ground Truth Labeler app also, as Image Labeler and Video Labeler, you can incorporate automation. Some of the automation which are provided are temporal interpolation, point cloud temporal interpolation depending upon the data. But here, what I did for temporal interpolation was, I labeled the first frame. I quickly jumped onto the last frame, labeled that. And I clicked on Automate. And all the intermediate frames are automatically labeled.
Similarly, I can accept it. I can go back to Point Cloud Temporal Interpolator, jump onto my point cloud data, do the labeling for the first frame, quickly jump onto the last frame, do the labeling for the last frame. And once I'm happy with the labels that are proposed, I can just go ahead and click Run and automate the labeling for all the intermediate bounding boxes. Once you are done with the labeling, you can actually export the labels, again, from the Ground Truth Labeler App, to automate the labeling-- to ingest it inside the labeler apps-- to ingest it for training your AI models that you wanted to train for your applications.
Now, we talked about a few things. Now, what if I'm working on the LiDAR point cloud data alone? To address that, there is something called as a LiDAR Labeler App, which allows you to work on multiple different kinds of the data types.
You could be working on ROSbags. You could be working on PCD/PLY file formats, which are more generic or standard point cloud file formats. Or you could be working on velodyne point cloud capture files, which is PCAP file formats.
And you can bring in all these different file formats directly inside the LiDAR Labeler App, use some of the capabilities that are available inside the LiDAR Labeler App for automation, as well as some of the preprocessing capabilities to just do preprocessing on the LiDAR point cloud data. Right.
Now here, once you have imported the LiDAR point cloud inside the labeler app, you can use some of the preprocessing techniques like hide ground to automatically remove the ground plane from the labeling task. You can use-- snap the clusters and some of the clustering algorithms to cluster your point cloud data. Once you are happy with the clustering that you have used, you can go ahead and you can also label your-- define your class labels, choose the type of labels that you wanted to have, and quickly snap the bounding boxes automatically.
Now, one other important use case for the LiDAR point cloud, since we are doing the labeling in the 3D, is the projected point cloud. So this is one of the very interesting use cases wherein you may not label very accurately the point cloud. And this projects it in the top view, side view, and front view, which allows you to very accurately label the point cloud. You can automate the labeling process, again with the help of Temporal Interpolator or incorporating any of the automation algorithms.
Right. Once you are happy with the labeling of the first and last frame, you can go ahead inside the Automate section, click Run. And this takes care of all the intermediate sections. Right.
One of the important points-- a mode I want to mention is, when you are working on the LiDAR point cloud data, selecting the right view for the LiDAR point cloud is very important for labeling task. So in this app, what you can do is you can choose what camera view you want, save that camera view, and you can invoke that labeler session again and again, and just use that camera view that you have prepopulated. You don't need to adjust your LiDAR point cloud again and again. And you can also share that view across multiple folks who are working on a simultaneous similar jobs as you are doing for the labeling.
Right. Now, one more thing that I wanted to talk about-- because we did talk about images, videos, LiDAR point clouds, synchronized point cloud data-- one other thing that I wanted to talk about is the Signal Labeler App when you are working on the more of a time series data for the labeling purpose.
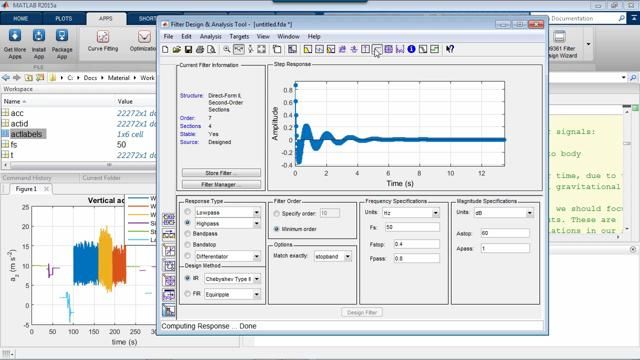
Now, similar to all these apps, Signal Labeler App can be launched from command line. You can import the signals, different supported signals, like numeric data, audio data, inside the app. And once you have this, here what we are labeling is particularly ECG data. ECG signal has three waveforms, that is, P wave, T wave, and QRS complex. And we will label these ROIs in our Signal Labeler App.
And also within the Signal Labeler App, you can do a lot of preprocessing, use panner to pan out the sections, different labels that we have proposed, different kind of labels. If I just wanted to label the peaks inside the scene, I can select the peaks inside the signals. Also, I can do a lot of preprocessing. Like, if I wanted to visualize the signal in the time frequency spectrum or frequency spectrum, I can do all of these things.
Also, when it comes to incorporating automation, I can also bring in some of the automation algorithm with the predefined template. All the automation algorithms that you have shown, that you have added, shows in the Automation section. You can either choose to label one instance with the help of automation algorithm, or you can go ahead and you can label all of the signals that you have with the help of that automation algorithm. And once the signals are labeled, you can just export those signals and use that for training of your AI model.
Now, before going further into the discussion or the session, I would request you to go back and answer one of the poll questions for me. The first question that I have is, what kind of data you are working on for your AI application? Is your data images or videos, signals, point cloud, synchronous image and video or point cloud data, or none of the above?
The second question that you have-- would you like to have a subsequent technical discussions for your application and use case? The poll will be open for you for a few seconds. I will go ahead and request you all to answer the poll questions so that it will give us more insights as to how we can connect and support you better.
Now, to summarize what we talked about today, we understand labeling is a very tedious and time-consuming job, but is absolutely necessary. MathWorks came up with a lot of different apps to help you automate the labeling process altogether. You can address challenges around the labeling by building a lot of preprocessing algorithms, incorporating these preprocessing algorithms inside these labeler apps to automate the labeling process. You can use some of the pretrained models which are already available in the community to automate the labeling process as well. So labeling is tedious, but there are a lot of ways in which you can automate the labeling process and make your life easier.
One of the things that we have done as well, as a follow-up to this session, is if you need help with the application of deep learning or labeling in your commercial or government projects that you are working on, you can send us your query on marketing_india@mathworks.in. I will also share my email ID at the end of the session. So just feel free to reach out to us if you're working on any active projects. We would be very happy to collaborate and help you with.
And in this particular expert consult session, we will look into requirement and invite you to book a 30-minute slot with our expert, where you can discuss about your problem statement, challenges, and we can brainstorm how we can support you better. Just an advise, only limited slots are available for this particular expert consult. We may not be able to guarantee all the applicants who apply for that. But we would be interested to hear as much as possible.
If you are interested to go for expert consult, please drop in a line in the chat window, reach out to us on any-- on this email ID. And we would be happy to book time and talk more about your particular application.
OK. So going ahead, this was our first session. Upcoming sessions on this particular webinar series are designing experiments and advancing deep neural network-- advanced deep neural network architectures. A couple of challenges that we have significantly seen in deep learning is how to build or validate our neural network architecture, and how to sweep through a lot of different hyperparameters and identify the best hyperparameters that can give us the robustness and accuracy that we want. So session one and session two are around that.
There are a lot of learning resources which are available for you to get quickly started. All the things that you see on the left are absolutely free. If you are new to artificial intelligence, MATLAB, deep learning, you can go ahead and take any of these online courses, which are freely available to you for two-hour courses and so on. Take it at your own pace. Then there are more detailed training courses which are available if you are working on automated driving, deep learning, artificial intelligence, those kind of use cases. There are a lot of webinars which are available, which you can go ahead and take for learning purposes as well.
Now, there are a lot of training options, like I said, available. You can get started for free with our online courses. Also, you can have a dedicated deep learning machine learning training, which are available for different levels, whether you're working on introductory level or intermediate level, on MATLAB Simulink. There are specialized courses in controls, designs, signal processing.
And also, if you have a requirement which is more custom, please reach out to us. We would be happy to customize the trainings for you as well.
That's all for today's talk. Thank you very much for attending and listening. See you in other parts of the series. And happy labeling.
Featured Product
Deep Learning Toolbox


Select a Web Site
Choose a web site to get translated content where available and see local events and offers. Based on your location, we recommend that you select: United States.
You can also select a web site from the following list
Americas
- América Latina (Español)
- Canada (English)
- United States (English)
Europe
- Belgium (English)
- Denmark (English)
- Deutschland (Deutsch)
- España (Español)
- Finland (English)
- France (Français)
- Ireland (English)
- Italia (Italiano)
- Luxembourg (English)
- Netherlands (English)
- Norway (English)
- Österreich (Deutsch)
- Portugal (English)
- Sweden (English)
- Switzerland
- United Kingdom (English)