Systematic Approach for Control Design using MATLAB and Simulink
Overview
Control System Design plays a vital role with increased need for automation. Traditional design methods are time consuming and turns cumbersome with the increased problem dimension. The challenges involved in the designing and tuning of effective control algorithms can be addressed by systematically applying control design techniques available in MATLAB and Simulink.
In this webinar, you will learn, how you can:
- Effectively tune PID controllers
- Design controllers for non-linear systems
- Automatically tune multiple loop controllers
About the Presenters
Rahul Choudhary, Application Engineer, MathWorks India Pvt. Ltd.
Rahul is Application Engineer with MathWorks India Private Limited and specializes in the field of Plant Modeling and Control System Design. He has over 7 years of experience in the area of Control System Design, Plant Modeling, Prognostics and Health Monitoring. Prior to joining MathWorks, Rahul worked with Eaton India Engineering Centre as a Control Engineer where he was involved in developing prognostics and health monitoring algorithms for proof of concept projects using MATLAB and Simulink.
He holds a master’s degree in Systems and Control Engineering from Indian Institute of Technology Bombay, Mumbai and a bachelor’s degree in Electronics and Instrumentation Engineering from Institute of Engineering and Technology, Lucknow, India.
Naga Chakrapani Pemmaraju, Sr. Application Engineer, MathWorks India Pvt. Ltd.
Naga is a Sr. Application Engineer with MathWorks India Pvt Ltd. specializing in the areas of Modeling, Simulation, Controls and Real-Time Simulations. He closely works with customers from Automotive Industry, Defense Labs and other Tier I Education Institutes in helping them adopt Model Based Design approach using MathWorks Products. He has over 12 years of experience working in controls for Automotive, Aero and Renewable Energy domains. Prior to joining MathWorks, Naga worked on controls for Wind Turbines at Vestas Wind System, on auto-code generation for Converter Controls at Northern Power Systems and on Hardware-in-Loop (HIL) simulations at Caterpillar Inc.
Naga holds a Bachelor degree in Electronics and Control Engineering from JNTU, Hyderabad and Master’s degree in Electrical Engineering from Texas A&M University, Kingsville-USA.
Recorded: 5 Aug 2020
Good afternoon, everyone. Welcome to the webinar on Systematic Approach to Design Control Systems. This session is offered by MathWorks, and I am Naga Pemmaraju. I'm a senior application engineer, mainly working in the area of controls, modeling, and simulation and real time simulations. I'm joined by my colleague Rahul Chaudhary, who is also an application engineer working in the area of modeling, simulation, and controls. Both of us will be actually dealing with a lot of the topics related to the control systems using MATLAB and Simulink in the next one hour.
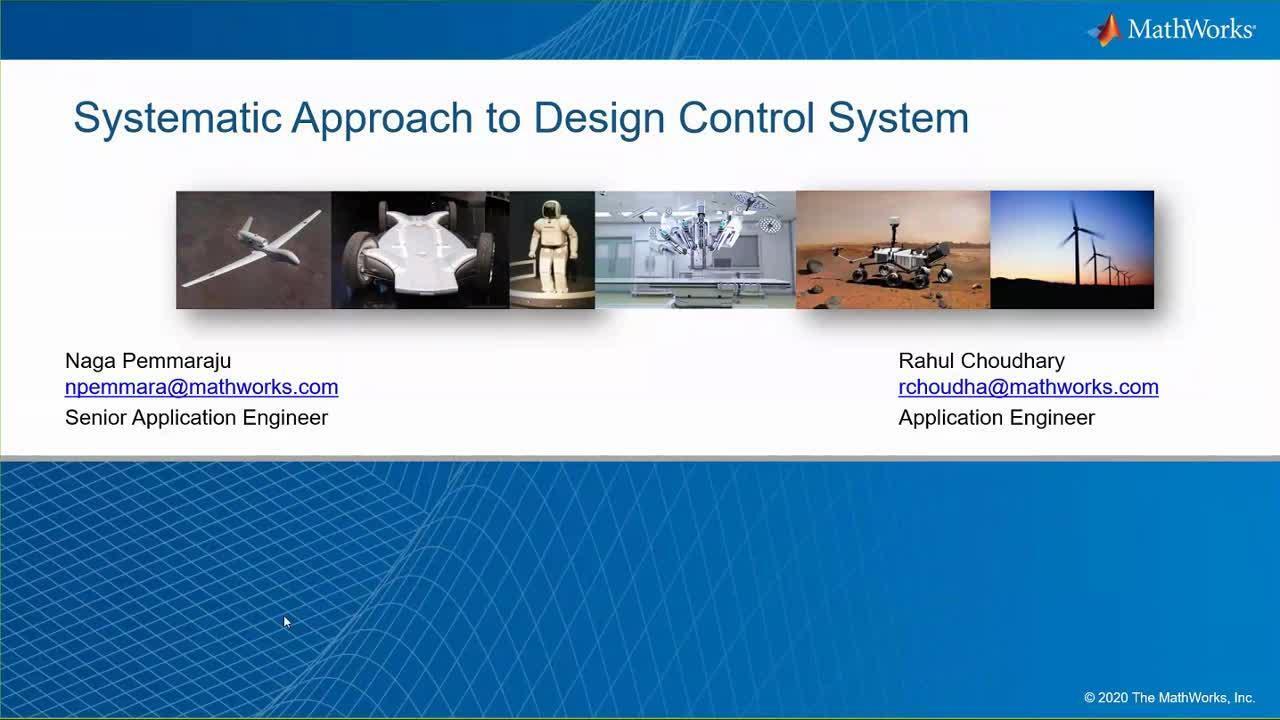
Let's start with a video. Here is a good video of a pilotless aircraft. And you can see, it's an Aurora-- Aurora Centaur aircraft. And it's pilotless, and it's more autonomous. Think about having a control strategy for such a system, where you do not have a pilot. And it's an aircraft, which by itself is a lot of complex systems for tuning your controls. So lot of things have to be taken care of, and also for tuning and designing your controls, it's a very tedious task.
So control systems play a vital role in such kind of complex systems. And now, controls is not just specific to one specific domain, right? As we saw in the video. It's actually a complete multidomain problem. And controls is now in across a lot of other domains. It's used in other domains like robotics-- a humanoid example, for that matter. Our Mars Rover, here the picture you see on the screen. It can be an autonomous system.
Now, and these autonomous self-driving cars or a UAV or any flights, for that matter-- flight controls. Renewable energy. It can be wind energy, solar. And last but not least, it's also being heavily used in the medical device industry, especially with the advent of robotic surgeries. And I think controls is playing at a very crucial role in this area.
So now with so much complexity, what are some of the challenges faced by any controls engineer? Right? The first thing is, we need to linearize a plant. A lot of these systems are nonlinear in nature. So unless or until we linearize the plant, we will not be able to understand the stability or design the controls for that. Also, we also need to tune the controller for various design specifications. And how can we, if it's a MIMO system or if it's a multiloop system, how do we deal with such controllers? And of course, finally, you need to fine tune, so that we have the optimal performance.
So let's try to understand the workflow of any control systems problem statement. And let's try to dig in to some of these areas. So here is a typical workflow for any control system problem, right? First, for any controls problem, you need to have the plant, for which you're designing the controls. So once we have the planned model, we identify what kind of an controls architecture is it? Is it a MIMO or is it cascaded controls? All of that.
And then we start tuning the compensator. Now, this is a straightforward thing if it's a linear system. If it's a nonlinear, we also need to consider the linearization aspect of it, or trimming some parts of the system for a specific operating point. And provide data as an input to the compensator design. And for us to design the compensator, we need some kind of specifications, like performance specifications. What are my gain margins? What my face margins? What is my stability region? And all of that, right?
So we need to provide all those goals. What we call as goals for tuning the controls. And once we provide that, we tune the compensator. And once we tune the competitor, again, we connect back to the plant and do a full fledged simulation, to understand the behavior of the controls. And if required, we'll fine tune the system performance.
So during this webinar, the next one hour, we'll be mainly focusing on these aspects except for the plant model. Will be mainly focusing on the linearization aspects of it, tuning controls, various kinds of controls, for that matter. And then, of course, we'll also focus on fine tuning the system performance, right? Here is the agenda for this session, right?
First, we start with understanding or analyzing the plant model. Because unless or until you understand the plant model, we cannot get into the controller design. Then, we'll focus on the classical controls, using the controller design system, controller design approach. Then, we'll focus on the PID controllers-- how do you interactivity tune it? There a lot of new features, like auto tuning of the PIDs. So, we'll be focusing on to those topics under this. Then, we'll move on to the multiloop MIMO controls. And then finally, how do you fine tune some of the controller performance? This will be the topics of this session.
Let's start with the analysis, right? So an analysis of the plant model. So what do we mean by this particular phrase? Even before we get onto the controller, we first need to understand the plant model, right? What is the current state of the plant? Is it a linear system or a nonlinear system? So as we discussed earlier, if it's a linear system, it's straightforward. You can just start designing your compensator controls-- decide on the control strategy. But if it is a nonlinear system, you first need to linearize your plant, right?
We will try to understand what kind of an operating point or weight exactly we want to linearize, and then for that specific region, we'll try to fine tune our controls. And then understand the frequency and time domain analysis and then take it forward. So let's focus on the linearization of the plant model. So basically, it has two steps, right?
First, we need to identify the operating point. And then, at that particular operating point, we need to find a linear system. And now it need not be just one operating point, it can be multiple operating points. And different ways of doing it-- first, way of identifying the operating point, you just trim the model for the particular region, right? Or if you're having a simulation a plant model running as a simulation, you can take a snapshot of it at a particular time frame. And you can actually do your controls for that particular snapshot aspect.
Then, the second one is the frequency response estimation. So these are the two ways you actually do the linearization of your plant. And here we use a tool called Linear Analysis. It's part of control systems and Simulink control design. So let's quickly see how this can be done by taking one example. All right, so here is a model of a combustion engine. And here you can see various subsystems dealing with the system.
One talks about the vehicle dynamics. I know one is talking about the throttle and manifold and et cetera. So if given, this is my plant model. How do I take this forward, right? So that's where we'll the problem statement. Once here, we can actually go to the apps. And in the apps, we have an option called Linearization Manager.
So once we click on the Linearization Manager, we need to first provide various inputs and outputs that we want to consider for linearization, right? For example, here I want to say this could be my input perturbation. And this could be my output. So the moment I select one signal, your options get open. So probably, I can just say this is my input perturbation. And this could be my output.
So again, you're not just selecting at the far end of the model, it can be somewhere in between. Basically, you're trying to give where exactly I want to tap. For example, any classical controls designer would like to understand, what is my Bode plot between these two points, right? Between input to my plant model or input at the disturbance and output the measurements. How does my frequency response look like?
So you can actually provide such kind of an input and output points to the model. And then once you do that, we can get into the model linearization. So this will open this window for us.
And once we can see this particular window, the first thing we need to do is understand the model I/Os. So analyze the I/Os. By default, we can select the model I/Os, whatever the I/Os from the model. Or if you want to specifically identify a new set of I/Os, we can also do that. I'll just show you an example, but I won't get into that. So once I select a new system, I can go back to my model, and I can say, select a particular signal. And you can see that has been identified, and I can just simply add that particular signal.
And that particular signal, I can give an option of whether it's input perturbation, whether it is an output measurement, whatever that particular configuration of that signals is. So this way, I can add multiple signals just by selecting a signal from my Simulink model and then provide those options. So in this case, I'll go with the model I/Os for that.
Now coming back to the operating point. So we do have multiple options here. So one is the trimming of the model, and the second one we will be looking at today is taking a simulation snapshot. Let's start with the trimming of the model. The moment I click on the trimming of the model, the tool will identify all the states of the model and what are the inputs and outputs, right?
And now based on the states, I can actually select a state and trim my model for that particular state. So for example, in this case, I know my angular velocity is a fixed one, so I say, I know the value probably. I'll just keep it as 180 per second. I know the limits for this particular state. This could be 0.5. If you have specific inputs, you can give that, or you can just leave the tool. So the more inputs you provide to the tool, it will be easy for it to linearize at that particular operating point.
So once I give the base inputs, I can just say start trimming. And now in the window you can actually see the trimming has been completed, and an operating point will be op underscore trim1 has been created. So you can just click on this op underscore trim1. You can understand how the trim state looks like, right? So for example, the actual value is between 0.569 And it has taken the 180, the angular velocity is 180.
How about if you see the rate? It is way too low. Probably, I want to set some rate here as well. So I can go back to my system and actually give a different state. I'll go back here and say, instead steady state, I want to give-- sorry about that. I can actually set my limits or what should be the rate at which I want to change this particular angular velocity. I just give 50. So because I wanted to tune at that particular state, and I say start trimming again.
And now I do get one more operating point at this particular claim location, and you can actually see the new trimming state as here. So once I'm OK with this particular one, I will go ahead and would like to see how can I linearize at this particular point. So I can simply plot my Bode for operating point two. So you can see by default, operating point two has been selected here. And now I'm-- I clicked on the Bode plot, so you can actually see the Bode plot for this particular system, right? So this is one way. So if I click here, you also see the option of operating trim point one, right? And then operating trim point two. So you can actually verify your-- compare you results between various operating points as well.
So next, I would like to try-- create one more operating point by taking a simulation snapshot. So I can give one or multiple time instances where I want to take a snapshot of my system. In this case, I'll just select two seconds -- one at-- first second other operating point at time frame two, and I take a snapshot at that.
Can you all hear me? Is my voice audible? All right.
So we have taken a snapshot here. And now you can see one more op underscore snapshot one has been created. Now, I want to understand how the Bode plot looks for this particular one. So let me just click on the Bode and-- for this particular opening point. And you can now see the Bode plot for the new operating point. Right here, you can actually see-- since we have selected two time instances, we do have that here. and. Once I'm confident about this particular one, I can simply drag and drop this one into my MATLAB workspace, and-- so that it is available for me to take-- to use it for my further controller design. So here, we are just trying to understand the operating point.
Last, but not least, once we have identified these two approaches, there is also a one other approach on the estimation, in the frequency estimation. So I'll not get into too much details, but the idea is I can give my input signal as an assigned stream or any of the random signal. And then I can just select the-- what kind of frequencies I'm interested in, right? So I can just say-- for example, in this case, I can select the Linksys tool, which I'm interested. I can just say Initialize. These are my frequencies which I want to monitor. I can just select the frequencies and give some kind of an amplitude and say OK. So it will give me some-- the set of frequencies, how they map. So you can see again one more has been created. I can just simply try to plot on the same Bode plot and understand how things are with respect to one.
So there are multiple ways of doing this linearization. So one is what we have seen today's. Here, you can see the various frequencies across the magnitude and phase here. So we have seen three different approaches today. One is trimming and the other one is a snapshot, right? The third one is a frequency domain-- frequency response estimation for the linearization.
All right. So once we have this, the next step is to basically get down to the controller design, right? So I will talk about another tool called as Control System Designer. Again, this is mainly used for your SISO controllers, single Input, Single Output. The main advantage is you can actually interactively tune your controls from the Bode plots or the root locus, directly? And you can have various kinds of architectures for your compensators, and you can do both time and frequency domain analysis, and also if it's-- understand the response for multiple control systems design. You know, understand which one is better for your specific application. Let's quickly dive into that. So let me close the older example.
So I will take a similar example, but now instead, I will actually add a little bit a portion of controllers to it. So here is my other model, which I want to talk about the Control Systems Designer. So if you see the same model, instead, I've now added one more PID controller and a reference filter that can help me fine-tune my systems.
So how do I do it? So by default, if you can see, I have one input perturbation and an output measurement at the output. So we have already set the model IOs. now, we can just get onto the Control Systems Designer. So we can just click on the Apps of the Control Systems Designer. So these are-- I mean, we have-- earlier, we used to find options on your menus, but I think since 2019, we have moved into providing app-based features. So all your features are now in the app, which is easy for you to-- easy for you to tune or make changes to your model.
So once you have the Control System Designer app open, the first thing it asks is which blocks of your model you want to tune. So the moment I say Add Blocks, it will sync with the model, and by-- and it can give us the complete model hierarchy. And I can choose which one-- which blocks I want to tune. So here, by default, it-- the tool will show you, OK, these are some of the blocks which I think you can tune. If you have some other gains for that model you want to tune, you get-- you can get in there and identify that. For now, let me just identify the PID controller and the reference filter. So once I say OK, it will-- I have selected those two blocks for tuning, and you can actually see those two coming up here.
So once I have this, the next step is to get onto my tuning, right? So I want to tune either a Bode or a closed-loop Bode editor. I want to take the root-locus approach for tuning my gains, et cetera. Let me take a simple closed-loop Bode editor. Here, what I need to do is I need to first identify the transfer response, open input IO transfer response. So for that, I need to specify what my input and what my output signals are. So once I click on our input signals, by default, it will identify a few signals. If, for some reason, it's not being identified, you can select a signal from the model, come back to the model, and select it, right?
So in this particular case, I'll just select my speed reference input as my input signal, my output as output coming from here. So output one. This will be output one, right? And another option, which is optional here, with what-- which loop-- you want to leave it open, right? So you can also give that if you have those details, if you think-- details that matter.
So once I click on the plot, again, I have the IO transfer a response, the Bode plot for that-- this particular one, right? So like this, you can actually set up a lot of-- identify a lot of criteria for tuning your controls. So one example of what we have here is a closed-loop Bode response, right? I also need to have step response. I also need to have Bode the open loop response. Now, how do I tune that, right? So I can add-- you know, tune everything, do it simultaneously. So I just open, in the interest of time, one of the existing designs. So by the way, you can actually save your design. So whatever things you have designed earlier, you can actually save that. And that's what I'm opening right now here.
OK. All right. So here, you see, again, the blocks have been selected. And there was one-- already one existing design that I have saved it earlier, so I'm just-- I'm using-- reusing that particular design to fine-tune my controller gains. And these are the various responses I'm interested in, right? So for example, I want to understand the response at the disturbance, right? How does my step response from the disturbance looks like? Again, I want to see my open-loop response, close-loop response, et cetera. So if you see, the first Bode is for the open loop. The second Bode is for the closed loop. And then I have a step response from the disturbance as well as with respect to my reference, right?
Now, I can actually understand-- from here itself, I can interactively change my-- I know a pole position or a zero position here and actually get-- understand impact of this on the complete closed loop versus the step response as well, right? So this is one approach. Or if I further want, you know, I can just-- for example, I can double-click on my PID controller. And here, itself, I can say, OK, instead of 0.003 as my gain, I want to have 0.05. Now, what is the impact of changing this particular gain? You can see it's-- you can see a lot of oscillations. It's not-- we are not able to achieve steady state at 3.504. So probably, I can-- I can also see how is it affecting my Bode plot, right?
So this is a very interactive approach. I would recommend you to explore and fine-tune your PID controllers or, for that matter, reference filters. This other approach here, if I want to fine-tune and P, I, D separately, right, I can just simply use a slider to see how this is behaving for me, right? The impact of the, say, integral, proportional, or derivative gain. And then once I'm fine with this particular, gains or if I'm-- if it is meeting my design criteria, I can simply update my block and get onto my design part.
So this is about doing the classical way of tuning your transfer function of your controller and then see the response in both-- in the frequency and time domain simultaneously and take it forward. I will now hand it over to my colleague, Rahul Chaudhary, who will walk you through-- specifically with respect to the PID controllers, and also he will also talk about the multiloop controllers. Rahul, over to you.
Thank you, Naga. OK, so I hope my screen is visible to everyone.
Yeah, we can hear you and see you. Rahul, can you be a little louder?
OK, is it better now?
It's better, yes.
OK, thank you, Naga.
Thank you.
So Naga spoke about a classical way of doing or designing your controller. I am, myself, a big fan of using classical methods to design any control system. But there are certain challenges associated with the-- I mean, that way of designing a control system. And some of the challenges I have listed down here, and you might also resonate to some of these challenges. The first challenge is how we can convert control design specification to controller gains. So if I-- my requirement is in terms of this much overshoot and this much of settling time, then how can we translate those requirements to Kp, Ki, Kd values, right? Right?
And the trial and error process-- it's time consuming, and there is no guarantee that you'll always hit the desired optimal performance from your controller, right? And second approach people might use, which is rule-based tuning to identify these gains. That rule-based tuning requires a lot of work, and one of the disadvantage is it cannot be, I mean, used for an unstable system, right? So that's what I'm going to discuss now, how we can mitigate some of these challenges through our workflow.
So a couple of things related to PID tuning based on different natures of your plant models. So Naga demonstrated different approaches to linearize your plant or to do stability analysis of your plant. So same approach I'll take, but in the context of a PID controller approach. So the first example which I'm going to take is basically a simple DC motor. And I'll be demonstrating how you can use transfer function-based tuning. So when I say transfer function-based tuning, basically, how you can extract linear plant model out of your nonlinear DC motor and use that model to tune your controller interactively.
OK, so this is the DC motor. And as you can see here, we have components from Simscape, which is our physical modeling tool, and we also have a controller, control is taking reference, and also a feedback. And it is giving control output to one of these actuators, and actuators are specifically driving your DC motor. And the objective is to basically control the angle. How we can control this-- how we can tune this PID controller in order to get the desired performance-- that's what we are going to do.
So what we'll do, we'll double-click on this PID controller, OK? Before that, let's run the model and see how it is performing right now. So as you can see, when controller is untuned, it is-- the response is quite oscillatory, and it is not even settling almost in 50 seconds. And the overshoot is also quite high, right? So let's try to tune this PID controller. So we'll double-click on the PID controller, and it is going to open this particular window where you can see there are different options available. So you can select different form of the PID controller. You can select continuous or discrete controller, right? And then you can see this button. And if you click on this tune button, it is linearizing your plant model. So whatever nonlinear plant model you have, it is going to linearize that plant model for tuning purpose, right?
So ideally, it should give you a direct linear plant model, but there is some problem in this particular model. And you might have also faced this kind of challenges when you design your PID controller. That plant model cannot be linearized, right? This particular error. And this particular error we are getting because initially those oscillations are very high. So what we can do, we can relinearize this closed-loop plant model, basically. And as one of the steps Naga mentioned, we can use this snapshot method. So around 40 seconds, we-- the oscillations were quite low, and we can use that as our operating point to get the desired-- I mean, linear plant model.
Once you click on this linearization button, it is running the plant model automatically. You don't have to do anything. And once it is done, it will give you a closed-loop plant model. Sorry, linear plant model which you can use to linearize using these interactive sliders, right? You can also open the parameters and you can see what kind of parameters you are getting in terms of control design specification, and then in terms of your proportional gains, integral gains, derivative gains, or the filter coefficient, and also, the controller parameters, like what is your rise time you are getting from the closed-loop system or what is your settling game, overshoot, exit term, right? So basically, these things you can use to tune your controller using these two sliders, right? So one slider is to control the response time. The other slider is to control the Aggressiveness or robustness of your controller, OK?
OK, so let's tune it interactively. So you can see the moment I change my response time-- because initial controller was very aggressive, so I am going to make the controller slower. Now, you can see the moment I move this slider, the real-time impact of the gains you can see on this window. And you can also see that all these parameters are changing automatically. Once you are happy that, OK, this meets my design criteria, you can click that, and you can say that, OK, this meets my requirement, and basically rerun your model. And you see compared to the earlier one, now, the response is much, much, much better.
There are certain amount of overshoot, definitely. And this can be basically minimized by fine-tuning your controller parameters. And one more thing which I want to highlight here, the kind of response which we were getting in the PID Tuner app, it was kind of critically damped, and there was no overshoot. And when we used the same PID gains to test against the nonlinear plant, you can see there are-- there-- I mean, the response is slightly different. Not drastically different, but slightly different. And the reason for that is in PID Tuner app, it was showing the response against the linearized plant model, but in this particular case, we are testing it against the nonlinear plant model. And that's the reason if you use PID Tuner app to design your controller, later on you have to do some amount of fine-tuning, which we will discuss later on.
So this is one type of example where you have initial oscillations. And PID Tuner cannot linearize your plant, and you can take advantage of a snapshot or a trim. The second advantage is basically-- the second example is, again, from the electrical domain, but this time, the plant module is slightly different. So the theme of this particular webinar is how to systematically design your control system and not to worry about what kind of plant model we are using. So that's why I'm going back and forth between multiple plants models, just to demonstrate the capability of Control System Design tool.
So next example is basically a sepic DC-to-DC converter. And one fundamental difference between previous plant model and this plant model is we have this big switch. So in the previous plant model, initial-- there was initial oscillation, and we could use, later part of the assembly model to linearize the plant model. But in this particular case, the switch is always going to be there in your plant model. It is going to contribute to your system dynamics, right? And when you have this kind of discontinuous behavior, how we can tune the controller-- that's what we are going to discuss.
So first, we'll run this Simulink model and see how-- what kind of output we are getting in the presence of this particular switch, right? So I'll run this model. This model, we have developed in some Simscape Electrical. So plant model-- it can be developed in any platform, be it Simulink or Simscape. That is not important here.
And you can see this untuned controller is giving us a lot of oscillations, and definitely this kind of performance is not acceptable. So what we are going to do, we are going to follow the same workflow. We'll double-click on the PID block and try to do this by using the same method, what we used earlier, right? Now, in this case in the presence of switch, it won't be able to linearize the plant model, right? Now, what we can do-- definitely we cannot use snapshot in this case because switch is going to be there throughout the-- I mean, simulation time.
So what we are going to do? We are going to identify a new plant model? How we are going to identify? We are going to take advantage of input-output data, right? So if you have already collected data from your setup, you can use that data. Or if you don't have them, you can use this nonlinear Simulink model to compute to get input-output data, right?
What we are going to do here is basically we are going to perform a simple step test. We are going to inject some kind of perturbation, so U0, you can see here, this is the initial, or you can see my operating point. So I will take my system to my operating point. In this case, maybe 0.35. And I'll wait for some time, till my system reaches to that operating point. And then I'll give a small perturbation from that operating point, right?
And then I'll run the simulation. It is going to run the simulation. I'm going to collect input-output data. As I said earlier, if you have input-output data already available, you can use that data to identify your plant model. That is not an issue, right? It is going to take some time, because it's just going to run your model multiple times. And once this simulation is done, you are going to get a plant model from input-output data. And this is something like that.
Now, I'm happy with this. Let's apply and close. Now, you can see there are two graphs. The green one is basically from the nonlinear Simulink model, and the blue one is basically identified based on input-output data. And there is some amount of offset, so what I can do-- either I can use my mouse and drag it to the desired value, or I can use this autoestimate feature, which is going to tune some of the parameters from your identified model till your response matches with the simulation data. Once you're happy with this plant model, you can apply and you can use this plant model for tuning. And after that, the story remains the same. You've got your plant model and you can use these sliders to tune your controller, unless you get the desired performance from your controller, right?
So let's say this performance looks good to me. I'll say Update Block and close this. And you can see, it will update those gains in your PID block. And now if I run this, the performance should be much, much, much better. So now you can see there are less number of oscillations, almost now-- I mean, no overshoot. There is a small amount of overshoot, but compared to the previous, it's very less, right?
So the second plant model, when you have switching devices or you have discontinuous dynamics, how, still, you can use PID Tuner app, how you can still use input-output data to identify the plant model and tune your controller, right?
Another feature which we have recently introduced in our PID Tuner app that is nothing but basically a frequency domain-based unit. So whatever we have seen so far, everything was with respect to time domain. So we gave initial perturbation to the plant model to identify linear plant. Now, same thing can be done by using a frequency domain. So I'm taking another example. I'm switching between multiple examples just to demonstrate that the plant model is not the focus here. We can take any plant model. The idea is how to design the controllers, right?
So again, I mean, just the-- you can see here, the controller is sitting there and is sending data to this PWM signals, and PWM signals are basically driving these two switches. And if I run this model, as expected, since controller is not tuned, so output response is not going to be very good. And you can see here, controller output is toggling between 0 and 1. It's kind of bang-bang controller, which is not good for our actuator, right?
So what I'll do-- I'll, again, go back to the PID block. And this time, instead of using the old approach, what we have-- what I have shown you earlier, or have shown you earlier, I'll be using something different-- basically, frequency response-based tuning, right? So once you select this frequency response-based tuning and click on tune button, it won't give you the-- I mean, in earlier, window it is going to give you something else. And you can put your design parameters here, like what kind of bandwidth you want. So basically, the guess is it should be 2 divided by the rise time, and I want this time to be 0.5 millisecond, right? And start time is 0.2-- 0.002, which is-- I mean, just to avoid the initial transience. And the duration is going to be basically 100 by bandwidth, so I'm using the same thing. The amount of perturbation which I'm going to inject, since output of the PID is a duty cycle, so I'm going to inject small perturbation of 0.1.
Once you fill up all these values based on your plant specification, what you can do, you can simply click on the Tune button. And tool is going to do every thing for you. It is going to inject those perturbation to your plant, and it is going to identify a frequency response, and it is going to use that frequency response to tune your controller, right?
Now, one thing you would have noticed here, in this particular case, even though we have lot of switches present in my model of discontinuous dynamics, I don't have to do anything special about that. So frequency response-based approach can use this. And you can see here, it has done the job, and it has given us what should be the Kp, Ki, Kd values and the filter coefficient, right? And it has automatically updated those values in my PID block. And now if I rerun in the model-- and you can see the output is going to be a lot different, right? So you can see here, the plant is quickly able to settle to the desired set point, and the controller output is not bang-bang anymore, right? It is not oscillating between 0 and 1. It is well within the bounds and without any chattering or things like that. And the last one is basically load current. Load current is acting kind of load-- acting kind of disturbance, which can come at any point of time. And you see controller is very well able to reset to the impact of disturbance on overall set-point goal, right?
So that's the frequency response-based tuning. Whenever you have a nonlinear dynamics, whenever you have a switching dynamics or discontinuous dynamics in your plant model, this frequency response-based approach is something which you can use for tuning your controller, OK?
Now, next is-- this next is basically PID Autotuner. So this is a new block what we have added in a recent release. So whatever methods I have shown so far, in all the methods, you have to click, and you have to identify the plant model. You have to use sliders to come up with the desired performance. What PID Autotuner block is-- has to offer is basically you can set your requirement, and it is going to do everything for you.
So now you can see in the same model, what I have done, I have added a PID Autotuner block. So there are two separate parts. And I have connected them through a manual switch. So first, I'll use this PID Autotuner block to automatically tune my controller. And then I'll use that controller to see whether it is giving me desired performance or not, right?
So I'll go inside this PID Autotuner block, and this particular block is basically-- as you can see here, it's a-- this is a PID Autotuner block. It takes input which is coming from your controller. It takes an output measurement from your plant. And then there is something called start and stop. So basically, when you give one or enable signal to this PID Autotuner block, it is going to estimate what should be your PID gains based on the control design specification, right? So when it is one, it is going to estimate the gains. When it is 0, it is not going to do that. So idea is-- why we have this start-stop? So that first, you take your plant to some steady-state value and then start estimating your PID gains. Do not try to estimate gains when it is already in the transient mode, because in that case, you probably won't be able to get the right gain.
So if you double-click on this PID Autotuner block, you can see some of the design parameters such as-- I mean, whatever we fed to the frequency response-based tuner, like what is my target bandwidth, what kind of controller I am using, whether it's discrete or continuous, right? And the second Experiment tab, where you can stick-- tell whether plant is stable or it is ramping up. And the third one is basically what kind of signal you want to inject to your plant. And then once it is done, what is the PID block? Which parameter-- whose parameter you want to obtain, right? So those things you can do.
One very good thing about this PID Autotuner block is it can be used even if you don't have any plant model or if you have a plant model which is running in some other tool, which is not from MathWorks, right? So the idea is you configure your PID Autotuner block and the deploy this whole block into your microprocessor or microcontroller, whatever controller you are using. So this particular block is code-generatable. You can deploy this block to your controller, and then it is going to inject the perturbation to your actual plant or simulated plant, and it is going to identify the right PID parameters, OK?
So let's run the model. So we have already configured this PID Autotuner block, and now I am going to run the parameter-- sorry, run the model, OK? So let's run it. And this start-stop block is going to wait for some time till your plant resets to a steady state. And then it is going to enable this closed-loop tuner block to identify or to estimate the PID gains, right?
So now you can see here, this block has automatically identified the PID gains. This is kind of-- right? And once it has identified, what I can do, I can go to the block and say Update PID Block, and it is going to update these gains to my PID controller, right? Once it is updated, I can probably switch to PID Mode and rerun the model and see how it is going to perform in-- with these tuned parameters, right? So the simulation has run. And if I click on this scope, you can see here I'm able to reject the disturbance, and it is slowly settling to the set point value, right?
So the idea here is you don't have to use sliders to tune your controller anymore. You can use this PID Autotuner block, put it in your plant model, or if you don't have plant model, put it to your controller-- microprocessor or microcontroller and basically deploy it to your microprocessor and microcontroller and then run it. And it is going to first inject some small perturbation to your plant to identify the response. And then it is going to basically give you the PID gains, right?
So in terms of PID, we discussed the workflow for a different kind of plant models for switching dynamics, for oscillating plant model. And these are some of the benefits which I would like to highlight one more time. So this PID Tuner block supports all type of plant model. It breaks the loop from the controller to identify linear version of a plant model. And then it uses estimated plant model to compute your PID gains. That balances the performance and robustness of your controller, OK?
Now, next topic is tuning multiloop MIMO controllers. So life is not always going to be that simple. In many cases, you'll be having a lot of control loops, and either you can go with the classical way where you can tune the fastest loop first and leave other loops open, and then tune the rest of the blocks. But if there are a good amount of interaction between these PID loops, then probably it is not going to work very good. So if we can simultaneously tune all those blocks, then it is going to-- I mean, give us the desired performance. That is also going to consider all those interactions.
So the example which I'm going to take is, again, from aerospace industry. This is a chopper example. And we have to control these three things, PID loops, and then there is a feedback, which is basically just to decouple the interaction between these PIDs. So there a total four things which we need to tune here simultaneously, right?
OK, so let's first run this model and see how much-- what kind of response we are getting when it is untuned, right? So let's quickly run this. And you can see here, there is the-- when controller is not tuned, I am getting a response, which is going up to ten raised to 44, and definitely it is unstable response. It is unacceptable response, right?
So what I can do in order to do all these controllers, I can go to basically-- in the Apps tab and click on the app which is a Control System Tuner app, right? So I click on this particular app. And this is going to open this kind of interface. What we have to do, we have to directly-- I mean, we can actually go to the tuning part and select the block which we want to tune, right? So we can say add block. It is going to scan your whole model and it is going to give the blocks which can be-- whose parameters could be tuned. So I'm going to identify three PID and then one decoupling logic for the PID, right? So these are the parameters which I would like to tune.
And then I'll set up the control goals, right? So there are a total four goals in this particular case. One is tracking the set point, of course, so I'll click on this set-point tracking, and I'm going to identify the signals. So add signals-- basically, my reference. So I am going to select these three references from the Simulink model. And once it's selected, it is going to highlight in my Control System Tuner app. And similarly, I can also select my response from the model, which is theta, phi, and r values from the output of the plant model, right?
In this particular model, our control objective is to have a time constant of one second. So I'll-- going to leave it as one. And you can also change some of these parameters, like how much tolerance you want between a reference value and the final value. Once you set it, it is going to create this particular goal. And you can also see how much, I mean, you are deviating from the current. The next goal is basically stability margin of your controller. So I'll click on this target minimum stability margins, right? So I want to make sure that both my input and output-- they have some kind of stability margins. So I'll select the input first, and from the plant model add the signal, and specify gain model. So I want my gain model to be five and phase module to be 40. You can choose anything based on your design requirements.
And then same thing I'll do for my output as well, right? So w’ll go to the design goals. Same minimum stability margin. And this time, I'll select my output, right? OK, so select your output and specify how much gain margin and phase margin you want for it. So again, five and 40. OK. And the third one is basically in terms of closed-loop performance. So I want to stay away from natural frequency of oscillation for this particular plant, so I'll go and click on this constraint on closed loop dynamics. And once you click it, it is for the entire system. And I want my minimum natural frequency to be 25. So basically, I want to stay away from the natural frequency of oscillation so that I don't make my entire plant model unstable.
Once I set all these goals, probably I'll visualize-- in three different tabs, I can select this layout where I can see everything at once, right? And so you can see all your four goals. Now, what you need to do-- you need to click on this Tune button. The moment you click on this Tune button, it is going to use state-of-art optimization solvers to tune your controllers simultaneously, right? And now you can see, it is meeting your design requirement. Everything is below that yellow shape, right?
So whatever we have done interactively-- I mean, you can also generate, or I'll show you in just a few seconds, you can click on this update block, and then it is basically going to update all the design parameters to your nonlinear Simulink model right? And as I said, you can also click on this Tune button and download-- and you can generate a script. And so basically, what we have done interactively is going to generate a Live Script, which later on, you can use it for automation. Now, rerun this plant model and see whether we are getting better performance or not. And in this case, you can see it is quickly able to track on your set point within the specified control design limit without making your whole system unstable, right?
OK, so turning of new controller. This Control System Tuner app, it can-- it will allow you to tune your MIMO or SISO controller. There are a large variety of graphical tuning also based on from frequency response to transient response. You can select your design goals from the tool, right? And state-of-art optimization algorithm to tune your controllers simultaneously. And of course, you can generate a MATLAB code for automating your workflow, right?
Now, this is about tuning your controller, designing your controller. Finally, it comes to fine-tuning you controller performance, right? So we have designed the controller, but when we run that controller with actual nonlinear plant, the performance is not quite the same. It is a little bit of-- there is a little bit different. Same thing is applicable when you take your design control logic to your actual nonlinear physical plant, you probably may not get the exact same performance, and you may have to do some kind of fine tuning.
So what I'm going to do, I'm going to use a tool called Simulink Design Optimization, which is going to basically fine-tune your control performance or whatever objective you have set. Based on that objective, it is going to basically meet your design goals by solving a nonlinear operation algorithm, right? So in the interest of time, I'm going to take the same example, and I'm quickly going to set up the Simulink Design Optimization workflow, right? So if I run this, you can see I'm getting exactly the same performance what we got from-- after tuning it. So the idea is how to fine-tune this performance. I'll go to Apps tab. And from Apps tab, I'll take this response optimization, right?
And when I click on this response automation, it's going to open this particular app where we can go from left to right. So first, what we'll do, we'll specify the objective. And as you can see here, similar to Control System Tuner app, we have a lot of options where we can specify the controller requirement. In our case, I'm going to take a reference signal. I want my controller to follow that reference signal, right? So I'll select this signal property. So I'll specify a reference signal. And then it is going to follow that, right? So if you have already signal in your workspace, you can directly put those variables. In my case, I am going to just manually enter it.
So I want my controller set point to be 15 for initial 4 milliseconds, and then later on, I want it to step up to 25, right? So those values I'm going to specify here. And then I'm going to put these constraints on some signal. And in this case, that is my output. So I'll select the output and add this to my Simulink Design Optimization, right? Once you add it, you can say, OK. So you can see this is the desired trajectory which my-- I want my plant to be-- to follow. And then I'll select some of the design variables, so what variable by-- algorithm can basically tune.
So I want to make my Kp, Ki, Kd values and the filter coefficient. You can also specify some of the limits. So I don't-- I-- from my design, I know that these values cannot be negative, so I am going to put some minimum limit, like zero, zero, zero. The benefit of this is basically, I-- if you restrict the domain of these variables, your optimization algorithm will converge quickly. So similarly, if you know what is the upper limit, you can also specify it. In my case, I have no idea about upper limit, so I'm going to leave it infinity.
Once you set up this, you can click on some of the plots, like what is my initial response when I have not tuned the controller. So you can see that the initial response is something like this. And then I click on the tune button, and it is quickly going to run that optimization algorithm in the background, which is going to run your model multiple times. And you can see here it is slowly changing all the design parameters till your out-- controller-- till your plant output meets objective, right?
So I'm quickly going to forward this, because I mean, it is going to take quite some time. And basically, the idea is it is simply going to run your model multiple times unless you meet your design objective, right?
Once the simulation part is done, you can come back to your model and basically rerun it and see whether it-- how it is performing, right? So the advantage of Simulink Design Optimization is it is running optimization on your nonlinear plant. It is not linearizing your plant. So that's-- whatever kind of response you are getting in that Simulink Design Optimization window, you are going to get the same kind of response from your nonlinear plant model. So if I click on this scope, then you can see the fine-tuned response from my model, right? And you can see it is much, much, much better compared to what we got earlier.
So advantages of Simulink Design Optimization, of course, it works for-- with nonlinear plant model, and it also-- I mean, there is no restriction on how many variables you can tune at the same time. So you can use it for SISO system. You can use it for multi-input multioutput system, any kind of system you can use. So as I said, the advantage of Simulink Design Optimization, it can directly work with your nonlinear plant, right? You have a idea of frequency domain and time domain constraints which you can apply. You can use something called Sensitivity Analysis to identify which are parameters are sensitive to your design and you would like to tune that. And finally, of course, you can also generate MATLAB code out of this SDO window to automate your task.
We also have a Model Predictive Control Toolbox. And I am going to play a video from our--
OK. So some of the key features of Model Predictive Control. I'm not going to go into details. If you would like to work on Model Predictive Controller, if you have some queries related to MPC, then probably you can connect with us offline, and we'll be more than happy to answer your queries.
OK, so this is the-- I mean, overall, our toolboxes, what we covered and our control system toolbox suite. And we also have a lot of Tech Talks on Control System Designs starting from the PID controller till MPC or, in fact, reinforcement learning. So you can always take advantage of these Tech Talks if you are working in the area of control system design.
OK. And we also have our product page, product training, where-- I mean, we offer this training in multiple forms, so it could be self-based training or instructor-led online training. And you can explore our training offerings. We have more than 48 courses on MATLAB, Simulink, and different areas such as signal processing, control design, things like that.
Well, thank you for attending this webinar.
Yeah. Thank you, everyone. Thank you very much
Featured Product
Simulink Control Design


Select a Web Site
Choose a web site to get translated content where available and see local events and offers. Based on your location, we recommend that you select: United States.
You can also select a web site from the following list
Americas
- América Latina (Español)
- Canada (English)
- United States (English)
Europe
- Belgium (English)
- Denmark (English)
- Deutschland (Deutsch)
- España (Español)
- Finland (English)
- France (Français)
- Ireland (English)
- Italia (Italiano)
- Luxembourg (English)
- Netherlands (English)
- Norway (English)
- Österreich (Deutsch)
- Portugal (English)
- Sweden (English)
- Switzerland
- United Kingdom (English)