Simulate RoadRunner Scenario with Custom 3D Assets Generated from Single-View Camera Images
This example shows how to generate custom 3D assets representing vehicle and static objects from single-view camera images and import them into RoadRunner for scenario simulation.
Generating virtual scenarios from recorded sensor data enables you to mimic real-world driving conditions and offers an advanced platform to verify and validate automated driving functionalities. The RoadRunner Asset Library contains a robust collection of assets that you can use for testing, planning, and controlling the algorithms. However, assets created from real-world camera sensor data can be more realistic and can be helpful for verifying perception algorithms. You can use artifical intelligence (AI) models trained on such camera sensor data to recreate assets, mimicking the color, texture, and dimensions of the real-world objects. Recent advances in generative AI technology enable you to generate a custom 3D asset from a single-view camera image of a real-world object. This example generates 3D assets from single-view camera images by using an imageAssetGenerator object, which contains a pretrained TripoSR 3D asset generator model.
In this example, you:
Generate 3D assets of static objects such as traffic cones, manholes, post boxes, barriers, trees, and traffic lamps from single-view camera images of them.
Convert the generated static assets into RoadRunner assets.
Import the converted RodRunner static assets into a generated RoadRunner scene that contains roads.
Generate a 3D asset of a vehicle from the camera image and import it into a RoadRunner scenario by associating the generated asset with a trajectory in the scenario.
Simulate the scenario in RoadRunner.
This example requires the Scenario Builder for Automated Driving Toolbox™ support package. Check if the support package is installed and, if it is not installed, install it using the Add-On explorer. For more information on installing support packages, see Get and Manage Add-Ons.
checkIfScenarioBuilderIsInstalled
Generate Static Scene Assets
This example uses a subset of single-view images of vehicle and static objects from the Objaverse data set, ObjaverseImages.zip, attached to the example as a supporting file. Unzip the file into your current working directory.
imgFolder = "ObjaverseImages";
if ~exist(imgFolder,"dir")
    unzip("ObjaverseImages.zip",imgFolder)
end
Read the first RGB image from the data set into the workspace, and display the image. Observe that the first image represents a traffic object.
Note: If you instead use a custom image for asset generation, the input image must be a high-resolution RGB image that contains a single object.
imgFiles = dir(fullfile(imgFolder,"*.jpeg"));
IStaticAsset = imread(fullfile(imgFolder,imgFiles(1).name));
imshow(IStaticAsset)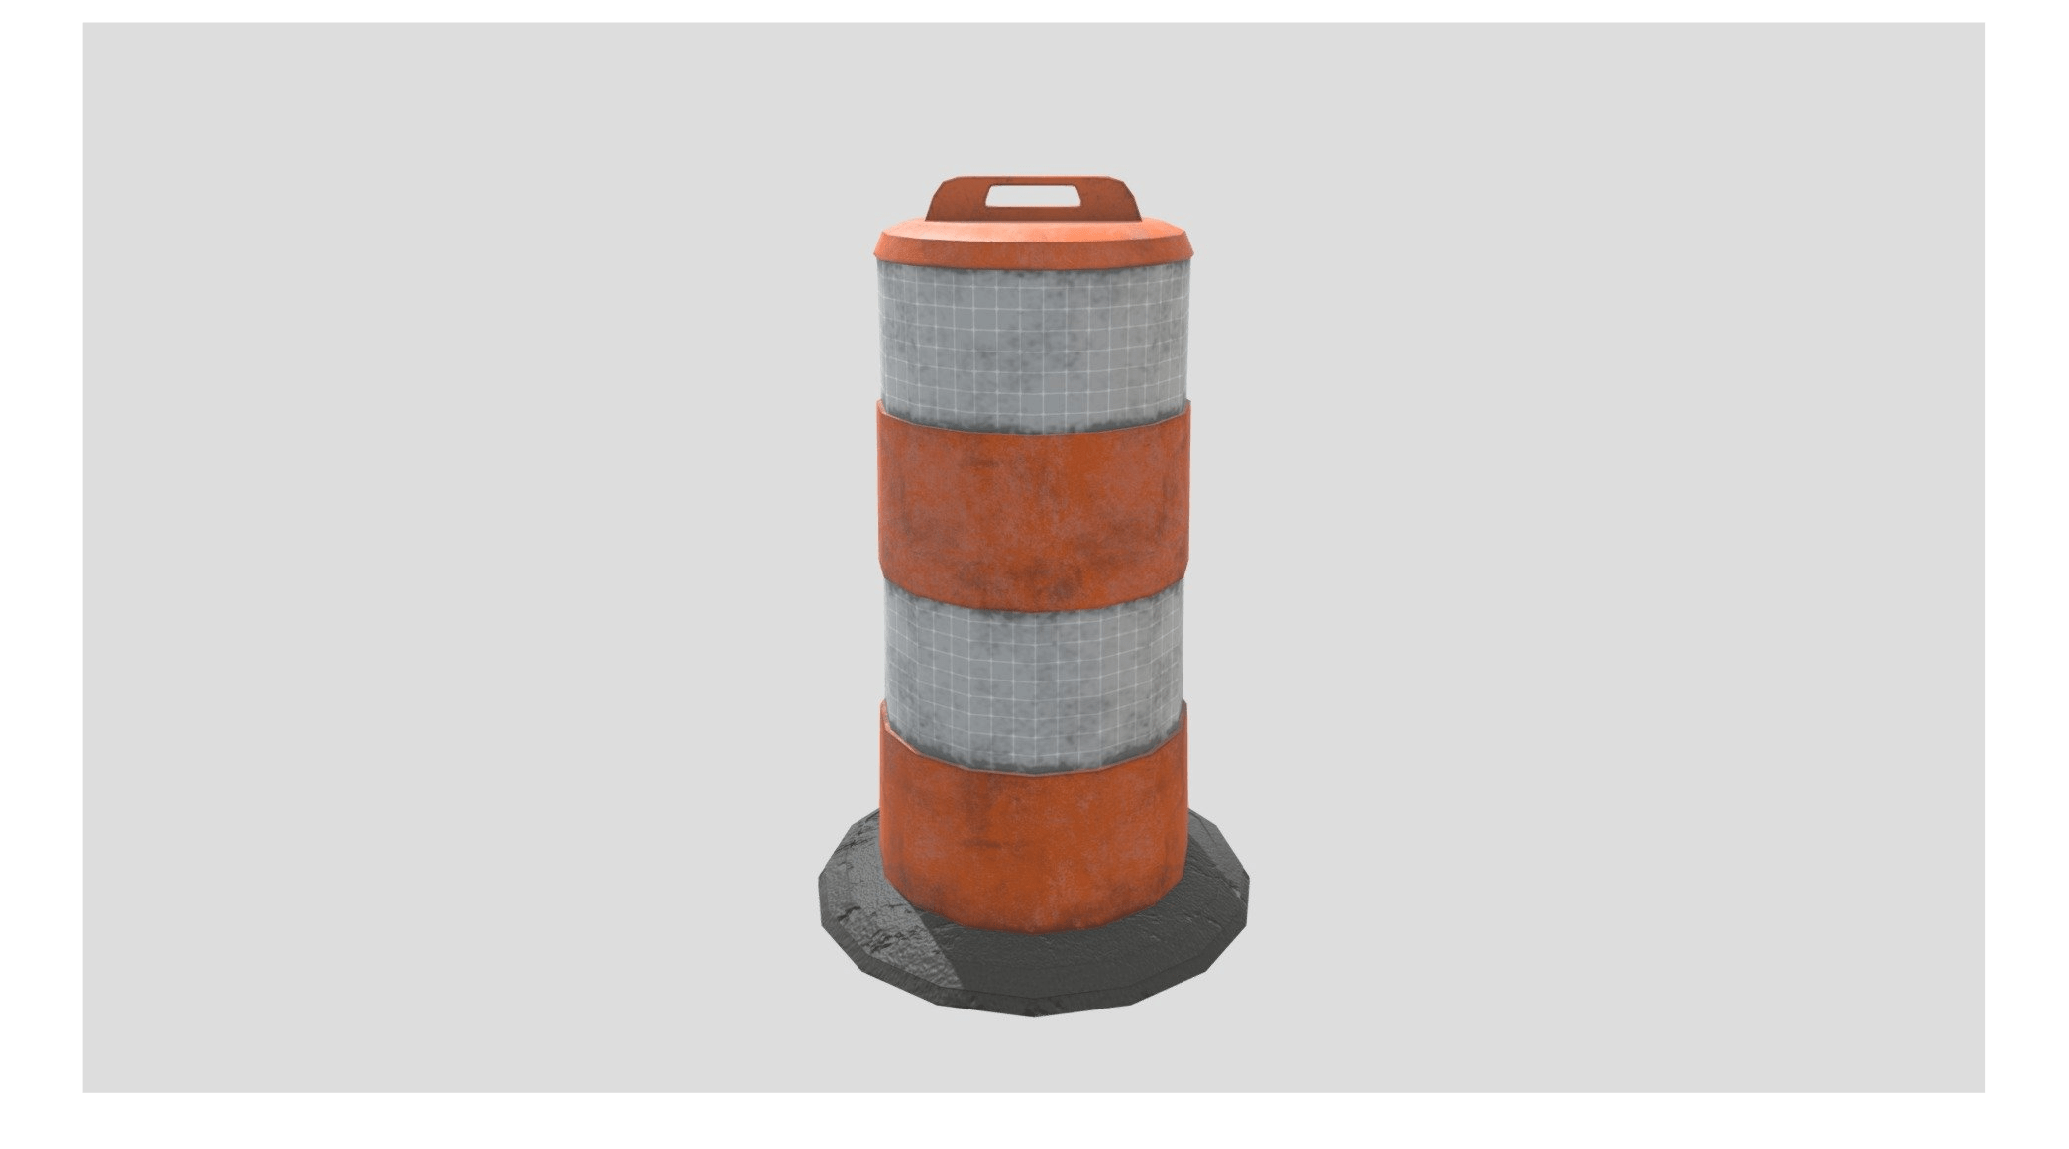
Prepare to generate 3D assets from single-view camera images by initializing an imageAssetGenerator object with the Model name-value argument specified as "TripoSR".
generator = imageAssetGenerator(Model="TripoSR");Generate a 3D traffic asset from the single-view camera image by using the generate object function of the imageAssetGenerator object. This example specifies resolution for the 3D asset mesh of 512 pixels. To change the resolution of the asset, specify a different value for meshResolutionValue.
Note: Increasing the mesh resolution value generates a more detailed mesh. However, this can result in increased memory consumption and longer computation time. To optimize computation time, use a CUDA® enabled GPU to generate the mesh.
The function represents the generated 3D asset as vertices, faces, and vertex colors. The returned vertex values are normalized and scaled to the range [–1, 1] to ensure consistent asset dimensions.
meshResolutionValue = 512;
assetTrafficObject = generate(generator,IStaticAsset,MeshResolution=meshResolutionValue)
512;
assetTrafficObject = generate(generator,IStaticAsset,MeshResolution=meshResolutionValue)assetTrafficObject = struct with fields:
vertices: [174122×3 double]
faces: [348236×3 double]
vertexColors: [174122×3 double]
Create a surface mesh from the generated traffic asset attributes by using the surfaceMesh (Lidar Toolbox) function.
mesh = surfaceMesh(assetTrafficObject.vertices,assetTrafficObject.faces, ...
    vertexColors=assetTrafficObject.vertexColors);
Display the generated asset. You can inspect the asset by rotating it using the options in the figure toolbar.
surfaceMeshShow(mesh,BackgroundColor="white")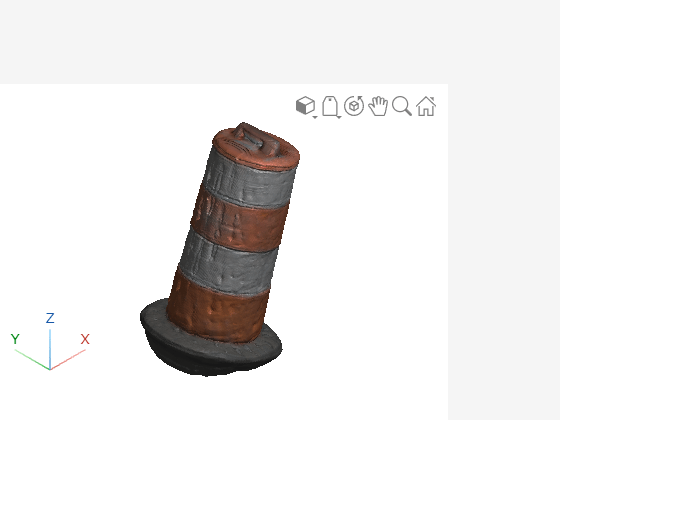
Convert Generated Assets to RoadRunner Assets
To open RoadRunner using MATLAB®, specify the path to your RoadRunner project. This code shows the path for a sample project folder location in Windows®.
rrProjectPath = "C:\RR\MyProject";Create a new directory, GenAIAssets, inside the Assets folder of your RoadRunner project.
genAssetFolderInRRProj = fullfile("Assets","GenAIAssets");
assetDir = fullfile(rrProjectPath,genAssetFolderInRRProj);
if ~exist(assetDir,"dir")
    mkdir(assetDir)
end
Write the generated 3D asset to the TrafficObject_Asset.fbx file in the GenAIAssets directory by using the writeSurfaceMesh (Lidar Toolbox) function.
assetFileName = "TrafficObject_Asset.fbx";
assetFileWPath = fullfile(assetDir,assetFileName);
writeSurfaceMesh(mesh,assetFileWPath)
To prepare generated static assets for import into RoadRunner, this example converts them to static objects in RoadRunner HD Map format by using the roadrunnerStaticObjectInfo function. First, specify cuboid parameters for the static object. Then, specify the relative path of the generated static asset to import into RoadRunner. If you are unsure of the position and orientation values to use for your asset, you can find the asset in the RoadRunner Library Browser, in the GenAIAssets folder, and drag it into a RoadRunner scene. In the Attributes pane, the X, Y, and Z components of the Position and Rotation attributes correspond to the elements of the cuboidXYZ and cuboidRPY vectors, respectively.
Note: The Scale attribute modifies the dimensions of a RoadRunner asset relative to the default dimensions of that asset, so you must manually determine the values of cuboidLWH.
cuboidXYZ = [-36.165 68.672 0.382];  % Position of the cuboid in the form [x y z]. Units are in meters.
cuboidLWH = [2 1 2];                 % Dimension of the cuboid in the form [length width height]. Units are in meters.
cuboidRPY = [4.06 -18.05 86.91];     % Orientation of the cuboid in the form [roll pitch yaw]. Units are in degrees.
staticObjectCuboids.pylons = [cuboidXYZ cuboidLWH cuboidRPY];
params.pylons.AssetPath = fullfile(genAssetFolderInRRProj,assetFileName);
By default, this example generates and converts a static asset for only the one image. To instead generate and convert static assets for all loaded images, enable processAllStaticImgs. Note that enabling the processAllStaticImgs can increase memory consumption and computation time. To optimize computation time, use a CUDA enabled GPU to generate the mesh.
Add the static object cuboid parameters and the relative file paths for the corresponding generated assets to the staticObjectCuboids and params structures, respectively, by using the helperGetStaticObjParameters helper function. The helper function uses a similar process to the one used to generate and convert the first asset.
processAllStaticImgs =false; if processAllStaticImgs h = waitbar(0,"Generating Assets..."); numImages = length(imgFiles) - 1; for i = 1:numImages waitbar(i/numImages,h,sprintf("Generating Asset for Image %d of %d",i,numImages)) IStaticAsset = imread(fullfile(imgFolder,imgFiles(i).name)); asset = generate(generator,IStaticAsset,MeshResolution=meshResolutionValue); mesh = surfaceMesh(asset.vertices,asset.faces,vertexColors=asset.vertexColors); [~,fileName,~] = fileparts(imgFiles(i).name); assetFileWPath = fullfile(assetDir,strcat(fileName,"_Asset",".fbx")); writeSurfaceMesh(mesh,assetFileWPath) end [staticObjectCuboids,params] = helperGetStaticObjParameters(staticObjectCuboids,params,genAssetFolderInRRProj); end
Generate a custom static object in the RoadRunner HD Map format for each cuboid and its associated generated asset by using the roadrunnerStaticObjectInfo function.
rrStatObjInfo = roadrunnerStaticObjectInfo(staticObjectCuboids,Params=params)
rrStatObjInfo = struct with fields:
    staticObjectTypes: [1×1 roadrunner.hdmap.StaticObjectType]
        staticObjects: [1×1 roadrunner.hdmap.StaticObject]
Create an empty RoadRunner HD Map.
rrMap = roadrunnerHDMap;
Add the generated static object information into the RoadRunner HD Map object.
rrMap.StaticObjectTypes = rrStatObjInfo.staticObjectTypes;
rrMap.StaticObjects = rrStatObjInfo.staticObjects;
Write the RoadRunner HD Map to a binary file in the Assets folder of your RoadRunner project.
rrMapFileName = "RoadRunnerAssetsScene.rrhd";
rrMapFile = fullfile(rrProjectPath,"Assets",rrMapFileName);
write(rrMap,rrMapFile)
Import Static Assets into RoadRunner
Specify the path to your local RoadRunner installation folder. This code shows the path for the default installation location on Windows. For information about creating a project in RoadRunner, see RoadRunner Project and Scene System (RoadRunner).
Open RoadRunner using the specified path to your project.
rrAppPath = "C:\Program Files\RoadRunner " + matlabRelease.Release + "\bin\win64";
rrApp = roadrunner(rrProjectPath,InstallationFolder=rrAppPath);
Copy the StraightRoad_AssetEx.rrscene scene file into the Scenes folder of your RoadRunner project. This scene has been created from recorded camera and GPS data by using the process in the Generate RoadRunner Scene Using Processed Camera Data and GPS Data example.
Open the RoadRunner scene from MATLAB by using the openScene function.
copyfile("StraightRoad_AssetEx.rrscene",fullfile(rrProjectPath,"Scenes"))
openScene(rrApp,"StraightRoad_AssetEx.rrscene")
To enable the import of multiple custom static assets into one scene, you must specify not to clear the existing scene data for each asset import.
Import the scene into RoadRunner by using the importScene function.
buildOpts = roadrunnerHDMapBuildOptions(ClearSceneOfExistingData=false);
importOpts = roadrunnerHDMapImportOptions(BuildOptions=buildOpts);
importScene(rrApp,rrMapFile,"RoadRunner HD Map",importOpts)
Generate Vehicle Asset
Read the RGB image of a vehicle into the workspace, and display the image.
IVehicle = imread(fullfile(imgFolder,"ZisCar.jpeg"));
imshow(IVehicle)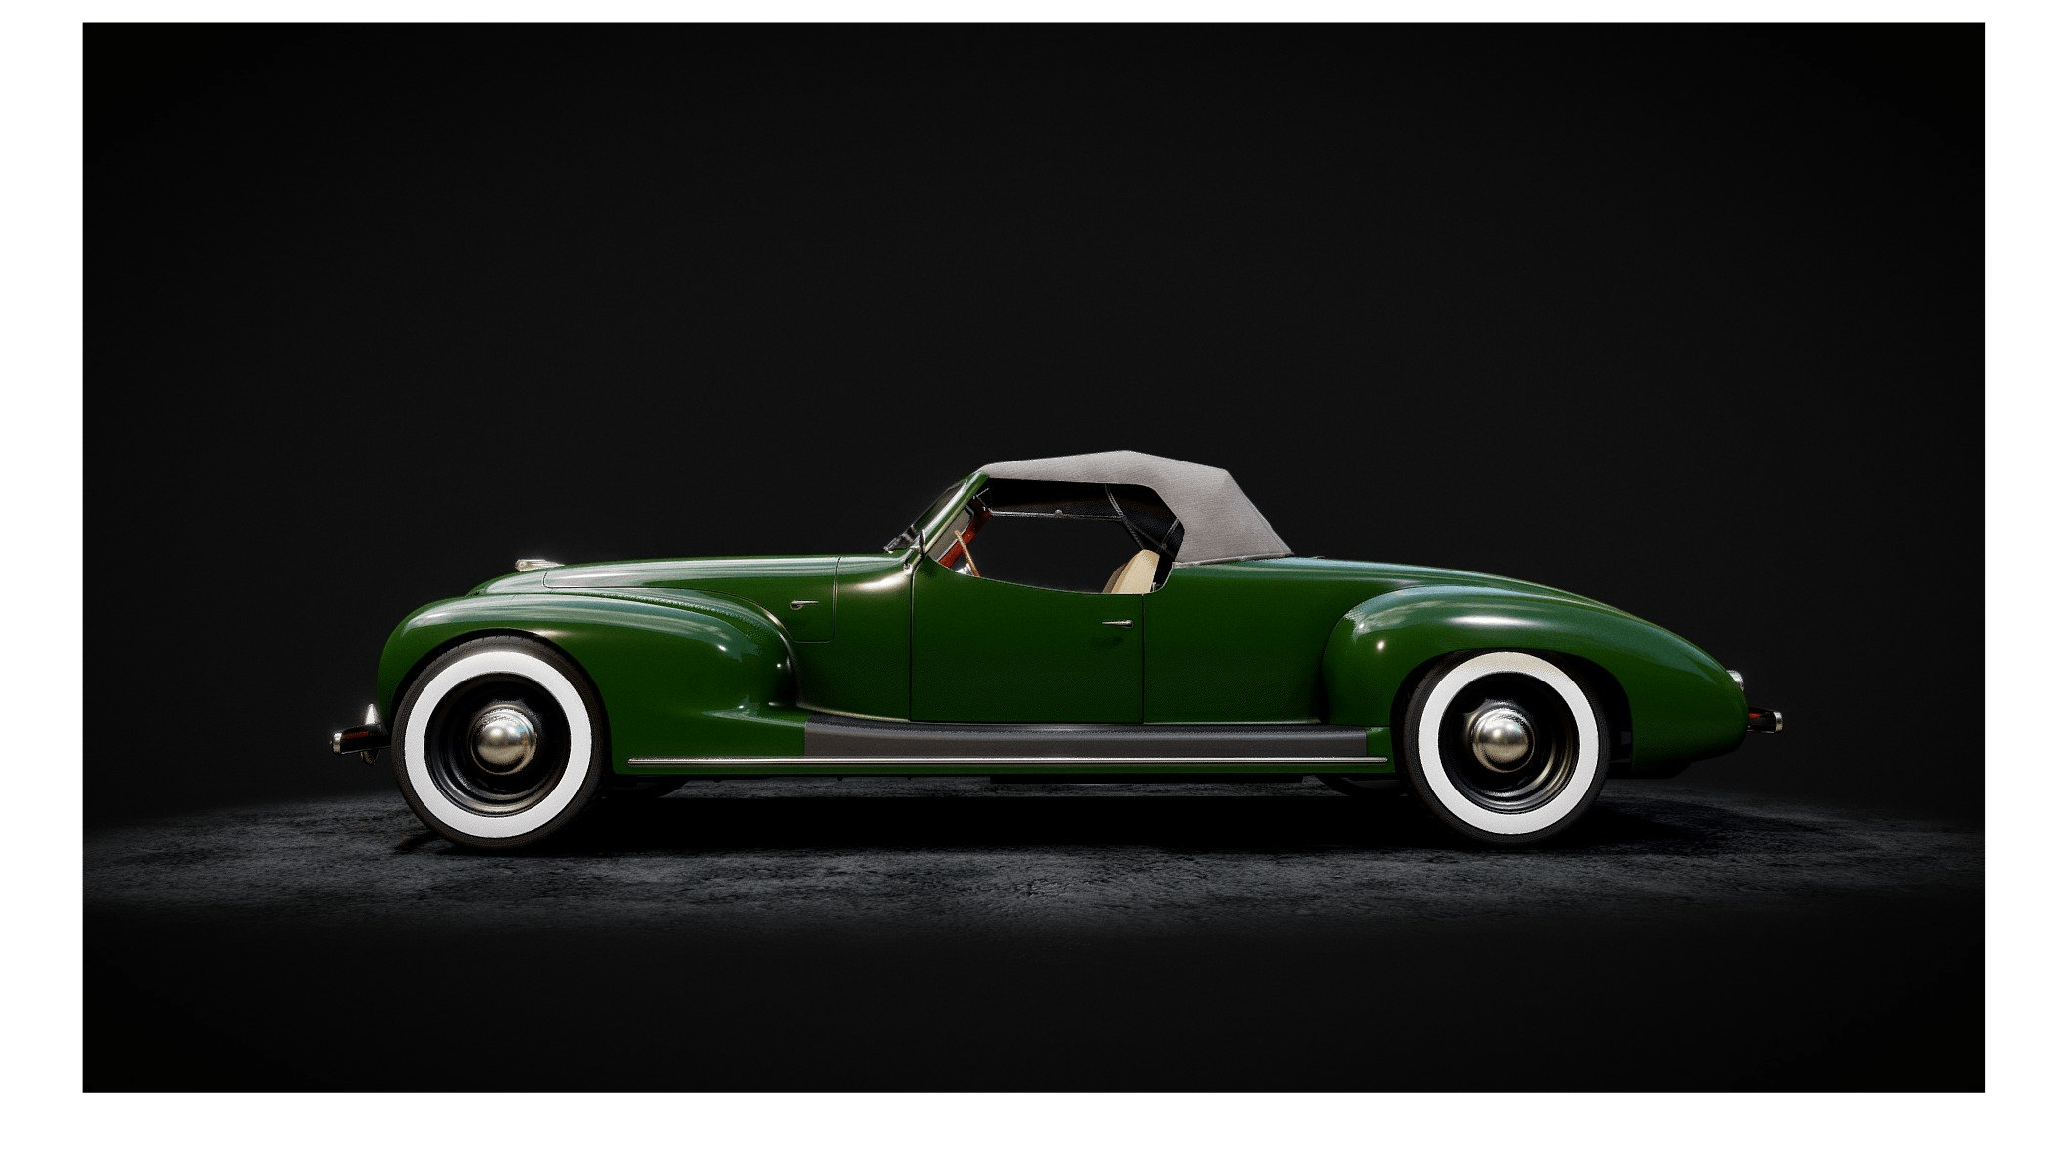
Generate a 3D vehicle asset from the single-view camera image by using the generate object function of the imageAssetGenerator object.
assetVehicle = generate(generator,IVehicle,MeshResolution=meshResolutionValue)
assetVehicle = struct with fields:
        vertices: [134708×3 double]
           faces: [269408×3 double]
    vertexColors: [134708×3 double]
Create a surface mesh from the generated vehicle asset attributes by using the surfaceMesh (Lidar Toolbox) function.
meshVehicle = surfaceMesh(assetVehicle.vertices,assetVehicle.faces,vertexColors=assetVehicle.vertexColors);
Display the generated asset. You can inspect the asset by rotating it using the options in the figure toolbar.
surfaceMeshShow(meshVehicle,BackgroundColor="white")
The generated asset might not have the correct scale, orientation, or position for use in RoadRunner, which can cause inaccuracy in the size, alignment, or placement of the asset, respectively. To ensure proper asset representation in RoadRunner, perform these steps:
Scale the vertices of the vehice surface mesh by using the
scale(Lidar Toolbox) object function of thesurfaceMesh(Lidar Toolbox) object. This example scales the vertices of the vehicle surface mesh with a scaling factor of 5.Translate the vehice surface mesh by using the
translate(Lidar Toolbox) object function of thesurfaceMesh(Lidar Toolbox) object. This example translates the vehicle surface mesh by 0.8 meters along the z-axis .Rotate the vehicle surface mesh by using the
rotate(Lidar Toolbox) object function of thesurfaceMesh(Lidar Toolbox) object. The forward direction of the generated vehicle asset is along the negative y-axis, but forward must be along the positivey-axis of an asset to use it in RoadRunner. This example rotates the vehicle surface mesh by 180 degrees along the y-axis.
scale(meshVehicle,5)
translate(meshVehicle,[0 0 0.8])
rotate(meshVehicle,"euler",[180 0 0],"ZYX")
surfaceMeshShow(meshVehicle,BackgroundColor="white")

Write the generated 3D vehicle asset to the ZisCar_Asset.fbx file in the GenAIAssets directory by using the writeSurfaceMesh (Lidar Toolbox) function.
assetFileVehicle = fullfile(assetDir,"ZisCar_Asset.fbx");
writeSurfaceMesh(meshVehicle,assetFileVehicle)
Import Vehicle Asset and Simulate RoadRunner Scenario
To simulate the scenario in RoadRunner, you must first associate the vehicle asset with a trajectory.
Load the vehicle trajectory data into the workspace.
Create a trajectory object from the loaded trajectory data by using the recordedSensorData function.
load("VehicleTraj.mat")
vehicleTraj = recordedSensorData("trajectory",egoTrajectory.timeStamp,egoTrajectory.positions)
vehicleTraj =
  Trajectory with properties:

               Name: ''

         NumSamples: 40
           Duration: 0.9750
         SampleRate: 41.0256
         SampleTime: 0.0250
         Timestamps: [40×1 double]

           Position: [40×3 double]
        Orientation: [40×3 double]
           Velocity: [40×3 double]
             Course: [40×1 double]
        GroundSpeed: [40×1 double]
       Acceleration: [40×3 double]
    AngularVelocity: [40×3 double]

        LocalOrigin: [0 0 0]
         TimeOrigin: 0

         Attributes: []
Associate the vehicle asset with the trajectory and export it to RoadRunner by using the exportToRoadRunner function of the Trajectory object.
exportToRoadRunner(vehicleTraj,rrApp,AssetPath=assetFileVehicle)
Connection status: 1
Connected to RoadRunner Scenario server on localhost:60729, with client id {d6c7ffb4-f910-4553-b0e1-d9d21b2fe121}
ans =
  roadrunner with properties:

    InstallationFolder: 'C:\Program Files\RoadRunner R2024b\bin\win64'
               Version: "R2024b Update 3 (1.9.3.059d0255441)"
             NoDisplay: 0
Create a scenario simulation object for the current RoadRunner Scenario by using the createSimulation function. The simulation object enables you to programmatically interact with the RoadRunner scenario simulation using MATLAB.
rrSim = createSimulation(rrApp);
Define the simulation parameters of RoadRunner Scenario. Specify the maximum simulation time as 1 second and step size as 0.0005. To plot the simulation results, enable data logging.
endTime = 1;
set(rrSim,MaxSimulationTime=endTime)
set(rrSim,StepSize=0.0005)
set(rrSim,Logging="on")
Run the simulation. Monitor the status of the simulation, and wait for the simulation to complete.
set(rrSim,SimulationCommand="Start")
while strcmp(get(rrSim,"SimulationStatus"),"Running")
    simstatus = get(rrSim,'SimulationStatus');
    pause(1)
end
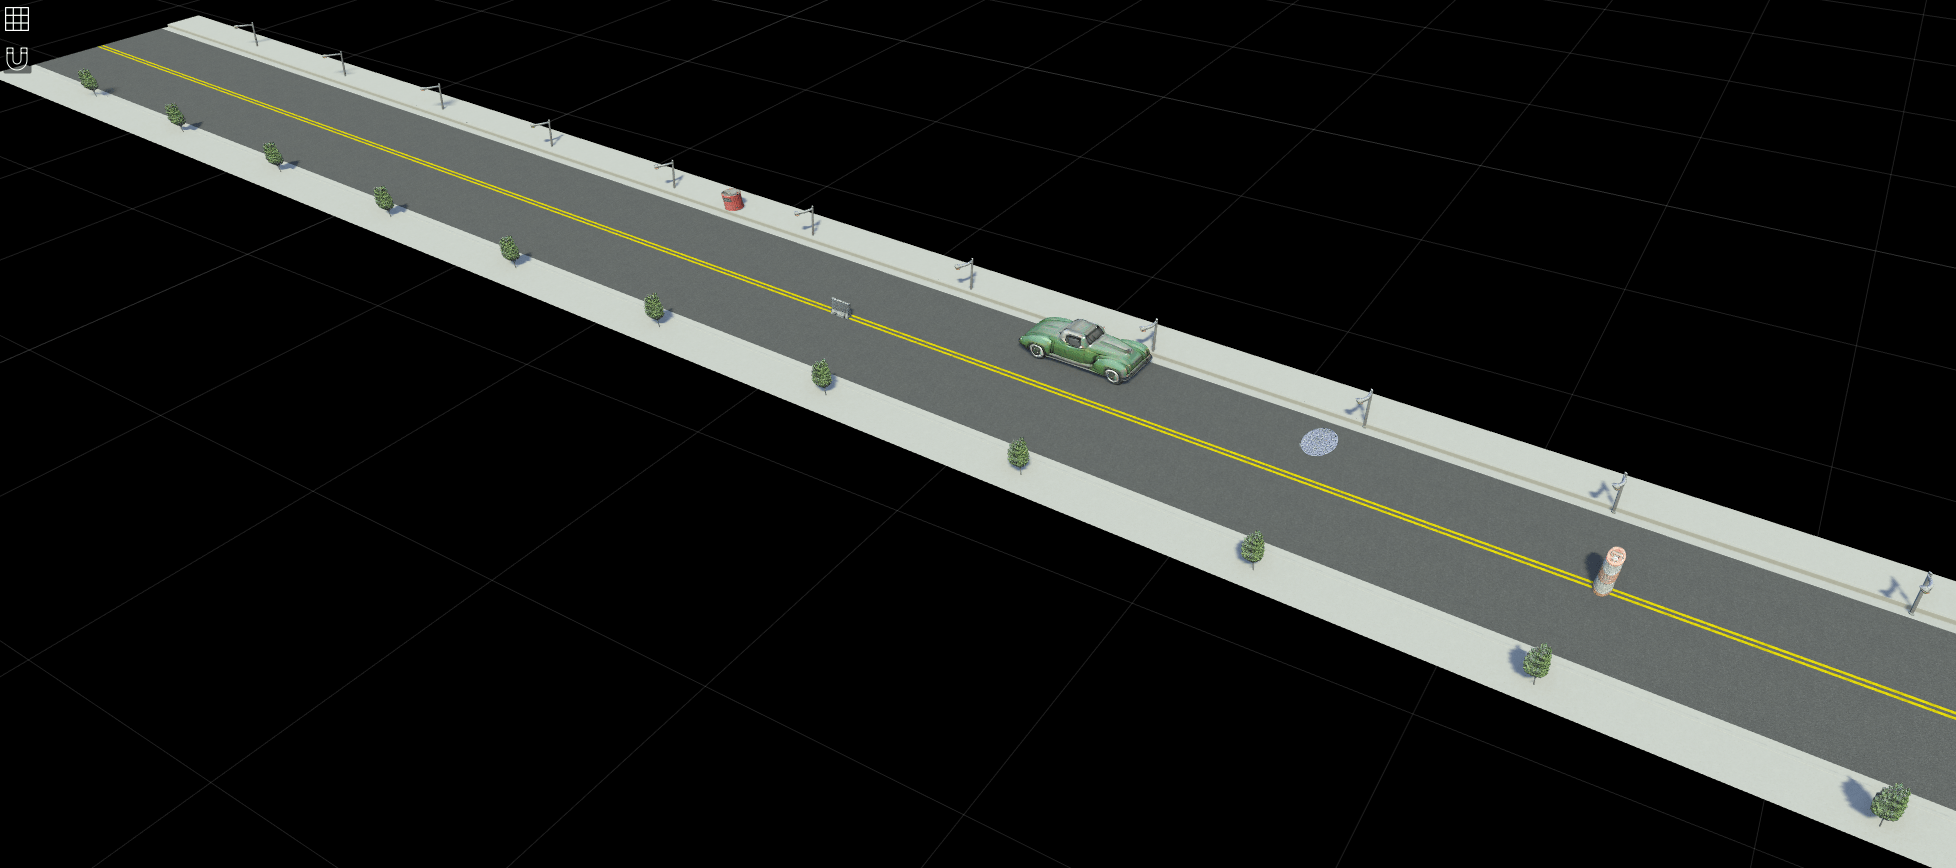
To specify whether to view the scenario from the ego vehicle view or chase view, in the RoadRunner Simulation pane, in the Camera section, set Camera View to either Follow or Front. Note that the Actor attribute is set to vehicle by default, which is the ego vehicle for the scenario in this example.
This figure shows a scenario created in RoadRunner Scenario that contains the imported 3D vehicle asset and multiple static assets that include a traffic object, manhole, post box, barriers, trees, and traffic lamps.
See Also
Functions
imageAssetGenerator|roadrunnerStaticObjectInfo|recordedSensorData|roadrunnerHDMap(RoadRunner) |Trajectory|exportToRoadRunner
Topics
- Optional Set Up for Scenario Generation
- Overview of Scenario Generation from Recorded Sensor Data
- Generate RoadRunner Scenario from Recorded Sensor Data
- Generate RoadRunner Scene Using Labeled Camera Images and Raw Lidar Data
- Generate RoadRunner Scene with Traffic Signs Using Recorded Sensor Data
- Generate RoadRunner Scene Using Processed Camera Data and GPS Data